Come costruire un refrigeratore d'acqua?
Come costruire un refrigeratore d'acqua?
Selezione dei componenti giusti per il tuo refrigeratore d'acqua
Quando si sviluppa un frigorifero per l'acqua, Scegliere le parti adeguate è essenziale per assicurarsi l'efficacia, integrità, e durata. Il processo inizia con la comprensione delle richieste dei dettagli della tua applicazione, come la capacità di raffreddamento ricercato, La quantità di acqua da raffreddare, e i problemi ecologici ambientali.
Le parti chiave di un frigorifero d'acqua sono costituite dal compressore, condensatore, Evaporatore, Shutoff di espansione, e refrigerante. Ogni parte svolge una funzione essenziale nel ciclo di refrigerazione:
| Componente | Riepilogo | Fattori da considerare |
|---|---|---|
| Compressore | Comprime il refrigerante e lo distribuisce tramite il sistema. | Scegli tra reciproco, rotante, pergamena, o tipi di viti in base all'efficacia e alle richieste di abilità. |
| Condensatore | Dissipa il calore dal refrigerante all'ambiente circostante. | Le alternative sono costituite da aria raffreddate o raffreddate ad acqua; Seleziona in base ai problemi ambientali e ai requisiti di raffreddamento. |
| Evaporatore | Prende il fuoco dall'acqua, Creazione dell'agente di raffreddamento per vaporizzare. | Piatto, shell-and-tube, o i tipi di bobina sono prontamente disponibili; Scegli in base alle restrizioni della stanza e all'efficacia dello scambio di calore. |
| Valvola di espansione | Controlla la circolazione del refrigerante nell'evaporatore, Ridurre la sua stress e la sua temperatura. | Termostatico, digitale, e le alternative del tubo capillare sono comuni; Seleziona in base alla precisione e al tempo di azione. |
| Refrigerante | Trasferisce il calore all'interno del sistema attraverso le modifiche di fase. | Considera l'effetto ecologico, efficienza, e compatibilità con i componenti del sistema quando si sceglie il tipo. |
Insieme a questi elementi primari, Parti complementari come le pompe, Filtri, e i carri armati sono fondamentali per assicurarsi che il funzionamento e la manutenzione fluidi. Raccogliendo di alta qualità, I componenti compatibili sono fondamentali per prevenire guasti regolari e inefficaci. Inoltre, Considerando la semplicità di approvvigionamento di parti di sostituzione e l'accessibilità del supporto tecnico per ciascun componente può influire sostanzialmente sul successo a lungo termine del tuo Chiller d'acqua progetto.
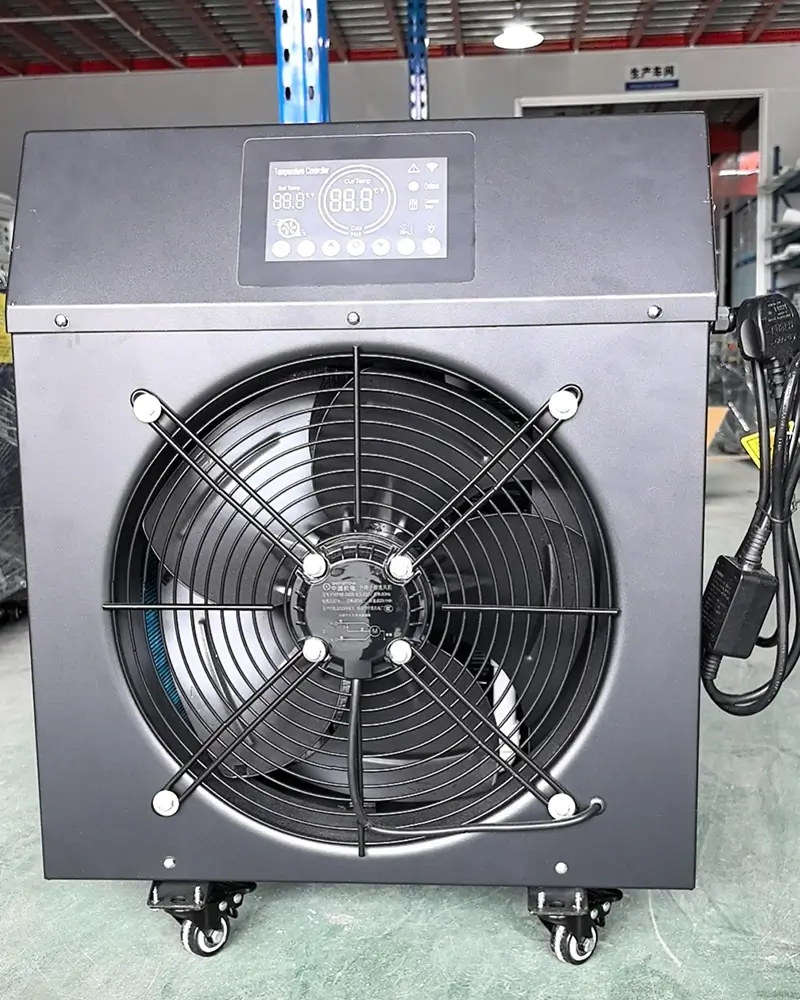
Mettere insieme il telaio e la base

Mettere insieme il telaio e la base
Quando si costruisce un frigorifero d'acqua, Il primo passo essenziale dopo aver selezionato gli elementi è costruire la cornice e la base. Questa struttura fornirà sicuramente l'assistenza e la stabilità necessarie per l'intera unità. Inizia raccogliendo un materiale robusto come alluminio leggero o acciaio inossidabile, compreso per la loro robustezza e resistenza al deterioramento. Assicurati che le dimensioni della struttura soddisfino tutti i componenti, compreso il compressore, condensatore, ed evaporatore, Con spazio adeguato per il flusso d'aria e il mantenimento.
Inizia tagliando l'acciaio in dimensioni richieste per la base e i supporti verticali. Utilizzare un saldatore o bulloni per collegare saldamente i pezzi, Sviluppare una solida struttura rettangolare. È importante verificare che la struttura sia livello e quadrato per impedire qualsiasi tipo di preoccupazione operativa in seguito. Per la sicurezza inclusa, Pensa di impostare le parentesi graffe lungo i lati e la parte inferiore del telaio.
Accanto, Prepara la base in cui si siederanno i componenti. Montare una piattaforma di metallo o di legno all'interno della struttura per fungere da base. Questo sistema deve essere solido adeguato per supportare il peso dei componenti e fornire una base stabile. Salvaguardare la piattaforma alla struttura usando viti o viti, Assicurare che non ci siano movimenti o flessioni.
Quando la base rimane in posizione, Affisse i piedi di gomma o gli ammortizzatori di risonanza alla base della struttura. Questi sicuramente abbassano il rumore e le risonanze, proteggere sia il frigorifero che la superficie su cui poggia. Assicurarsi che i piedi siano equamente distanziati e saldamente attaccati per smettere di ribaltarsi o traballare.
Con la struttura e la base impostati, Eseguire una valutazione dettagliata per convalidare tutte le connessioni sono strette e il framework è stabile. Questa struttura supporterà sicuramente l'assemblaggio intricato del sistema di condizionamento dell'aria, Quindi fare lo sforzo per garantire che sia robusto è importante per il funzionamento di successo del tuo refrigeratore d'acqua.
Mettere insieme il telaio e la base
Quando si tratta di impostare il sistema di raffreddamento per il frigorifero per l'acqua, la precisione e le cure sono fondamentali. Il sistema di raffreddamento è il cuore del refrigeratore, responsabile del mantenimento della temperatura dell'acqua desiderata. Questa sezione delinea le azioni vitali per assicurarsi una configurazione di successo.
1. Posizionare il compressore e il condensatore
Il passaggio iniziale è posizionare correttamente il compressore e il condensatore. Queste parti devono essere messe su una superficie stabile e di grado per ridurre le vibrazioni e il rumore. Garantire che ci sia un'area appropriata intorno a loro per il flusso d'aria e il mantenimento.
2. Montare l'evaporatore
Prossimo, Posizionare l'evaporatore all'interno del dispositivo refrigeratore. L'evaporatore è responsabile di assorbire caldo dall'acqua. Dovrebbe essere fissato in modo sicuro per fermare qualsiasi tipo di movimento durante la procedura. Utilizzo parentesili e viti adatti per assicurarsi che sia saldamente attaccato.
3. Collegamento delle linee del refrigerante
Dopo aver posizionato i componenti principali, Collega le linee del refrigerante. Queste linee porteranno sicuramente l'agente di raffreddamento tra il compressore, condensatore, ed evaporatore. Assicurarsi che tutti i collegamenti siano impermeabili per impedire qualsiasi tipo di perdita di refrigerante, che può mettere in pericolo l'efficacia del sistema.
| Elemento | Collocamento | In conclusione |
|---|---|---|
| Compressore | Superficie sicura e livellata | Consentire spazio per il flusso d'aria |
| Condensatore | Vicino al compressore | Assicurati un ampio flusso d'aria |
| Evaporatore | Unità refrigerata interna | Fissato in modo sicuro |
| Linee refrigerante | Tra compressore, condensatore, ed evaporatore | Connessioni ermetiche |
4. Montare i fan e i soffiatori
Fan e soffiatori sono essenziali per un'efficace dissipazione calda. Imposta queste parti vicino al condensatore per aumentare il movimento dell'aria e il raffreddamento dell'efficacia. Proteggerli nell'area e collegarli all'alimentazione, Garantire che funzionino senza intoppi senza ostacoli.
5. Isolare i componenti
L'isolamento adeguato è fondamentale per evitare la perdita di calore e migliorare l'efficienza. Utilizzo Prodotti di isolamento di prim'ordine per girare attorno alle linee dell'agente di raffreddamento e vari altri componenti. Questo passaggio aiuterà sicuramente a preservare il livello di temperatura desiderato e ridurre l'assunzione di potenza.
6. Esecuzione di un test di perdite
Prima di finalizzare l'installazione, eseguire un test completo di perdita. Ciò comporta l'esame di tutti i collegamenti e giunti per qualsiasi tipo di indicatori di perdita di agente di raffreddamento. Utilizzare un rilevatore di perdite o un servizio SOAP per ispezionare il sistema. Affrontare rapidamente qualsiasi tipo di perdite per garantire prestazioni ideali.
| Azione | Azione | Funzione |
|---|---|---|
| 1 | Impostazione del compressore e del condensatore | Stabilità e ventilazione |
| 2 | Evaporatore del Monte | Assorbimento di calore |
| 3 | Collegare le linee del refrigerante | Assicurati di connessioni chiuse |
| 4 | Imposta follower e soffiatori | Migliorare il flusso d'aria |
| 5 | Proteggere gli elementi | Proteggere dalla perdita di calore |
| 6 | Eseguire l'esame di perdite | Cerca perdite di refrigerante |
Seguendo queste azioni diligentemente, Puoi assicurarti che il sistema di raffreddamento del frigorifero dell'acqua sia impostato correttamente, Portare prestazioni e longevità ottimali dell'unità.
Collegamento delle linee d'acqua

Collegare le linee dell'acqua è un'azione critica nello sviluppo del tuo refrigeratore d'acqua. Include la creazione di linee d'acqua di ingresso e uscita che distribuiranno l'acqua con il sistema di raffreddamento, Fare un certo scambio di calore efficace. Per iniziare, Scegli di alta qualità, tubi robusti che possono sopportare le varianti di sollecitazione e temperatura normali nei frigoriferi dell'acqua.
Inizia attaccando la linea di acqua di ingresso alla fonte d'acqua. Garantire che il collegamento sia sicuro e privo di perdite utilizzando raccordi e morsetti adeguati. Accanto, Collegare la linea di acqua di uscita al punto di scarico del sistema di raffreddamento, Assicurarsi che il percorso sia dritto e totalmente libero da qualsiasi tipo di nodi o ostacoli che potrebbero impedire la circolazione dell'acqua.
Quando si trasmette le linee dell'acqua, Prendi in considerazione il formato del tuo refrigeratore e il posizionamento dei componenti per ridurre le curve e le dimensioni. Ciò assiste mantengono i prezzi del flusso ideale e riduce la minaccia di calo dello stress. Prodotti di schermatura dell'utilizzo ove richiesto per fermare il guadagno di calore dagli ambienti, che può influire sulle prestazioni del frigorifero.
Dopo aver sviluppato i collegamenti primari, Valuta tutti i giunti e le connessioni per le perdite. È una buona idea utilizzare un sigillante o un nastro in teflon su raccordi filettati per migliorare la tenuta ed evitare qualsiasi tipo di potenziale perdite. Quando tutti i collegamenti sono protetti, Riempi gradualmente il sistema con acqua, Osservando ogni giunto per qualsiasi tipo di indicatori di perdita. Stringere le installazioni come richiesto per garantire una configurazione a stretto acqua.
Alla fine, integrare un misuratore di circolazione e un indicatore di pressione nel sistema per tenere traccia e mantenere la portata e la pressione desiderate. Questi strumenti sono importanti per la procedura in corso e la manutenzione del tuo refrigeratore d'acqua, Offrire dati in tempo reale per garantire che tutto funziona senza intoppi. Ispezionare abitualmente queste metriche e riadattare come essenziale per mantenere un'efficienza ottimale.
Cablaggio elettrico e configurazione elettrica
Assicurandosi che tutti gli elementi elettrici siano valutati per la tensione e esistenti, certamente si trascino. Questo include l'alimentazione, interruttori, comunica, e qualsiasi tipo di cablaggio di controllo.
Posizionare l'unità di alimentazione (PSU) Sicuro nel framework, Garantire che ha un flusso d'aria adeguato per smettere di diventare troppo caldo. Attacca il PSU a una fonte di alimentazione ideale, assicurarsi di utilizzare fili correttamente classificati per affrontare il presente. Normalmente, Un frigorifero richiederà un PSU con un risultato di 12V o 24 V, A seconda delle specifiche del sistema di raffreddamento.
Accanto, Installa l'interruttore principale e qualsiasi tipo di pulsanti di controllo aggiunti. Questi devono essere convenientemente disponibili e chiaramente identificati. Per la sicurezza inclusa, consistono in un fusibile o un interruttore tra l'alimentazione e il resto del sistema per proteggerti dai sovraccarichi elettrici. L'adesione al tavolo espone la scala del filo suggerita per vari punteggi presenti:
| Attuale (Amplificatori) | Indicatore del filo (Awg) |
|---|---|
| Fino a 10a | 16 Awg |
| 10UN – 20UN | 14 Awg |
| 20UN – 30UN | 12 Awg |
Dopo aver stabilito i pulsanti, Continua a filare i refrigeratori dell'acqua. Questo è generalmente costituito dalla pompa, fan, e unità di rilevamento della temperatura. Assicurarsi che ogni componente sia collegato all'alimentazione e agli interruttori di controllo. Utilizzare connettori a cavo o giunti di saldatura per rendere alcuni collegamenti sicuri, sicuri e stabili, e scudo tutti i circuiti rivelati con tubi di restringimento caldi o nastro elettrico.
Per il sistema di controllo, È possibile utilizzare un termostato o un microcontrollore per gestire il livello di temperatura. Collegare i sensori del livello di temperatura agli ingressi del sistema di controllo, e il controllo risulta al relè o al transistor che attiva gli elementi di raffreddamento. Verificare che il sistema di controllo sia configurato correttamente per mantenere l'array di livello di temperatura preferito.
Finalmente, eseguire un'ampia ispezione di tutti i collegamenti elettrici ed elementi. Assicurarsi che tutte le connessioni siano sicure, e non ci sono cavi soggetti che potrebbero causare cortocircuiti. Utilizzare le connessioni del cavo per disporre in modo ordinato il cablaggio e arrestare qualsiasi tipo di disconnessioni accidentali.
Non appena il cablaggio è completo, Accendi sul sistema e verifica eventuali indicazioni di problemi elettrici, come surriscaldamento di cavi o interruttori di circuiti inciampato. Monitorare il sistema molto da vicino durante l'operazione iniziale per garantire qualsiasi caratteristica come significato.
Controllare e risolvere i problemi del tuo refrigeratore d'acqua
Dopo aver assemblato il frigorifero dell'acqua, Test e fissaggio sono azioni critiche per garantire l'efficienza e l'affidabilità ideali. Rispettare questi standard per controllare e affrontare metodicamente qualsiasi tipo di problema con il sistema.
Test iniziali
Inizia riempiendo il serbatoio con acqua e alimentando il refrigeratore. Osserva il sistema per qualsiasi tipo di problema immediato come perdite o suoni insoliti. Confermare che l'acqua circola correttamente e che il sistema di condizionamento dell'aria si sta impegnando.
| Esame | Risultato anticipato |
|---|---|
| Ispezione visiva | Nessuna perdita, collegamenti protetti |
| Accendi | Procedura regolare, Nessun rumori insoliti |
| Circolazione dell'acqua | Circolazione costante |
| Attivazione del sistema di condizionamento dell'aria | Declino della temperatura in acqua |
Controllo delle prestazioni
Visualizza il refrigeratore per un periodo più lungo per assicurarsi che mantenga il livello di temperatura ricercato. Utilizzare un termometro per controllare il livello di temperatura dell'acqua a intervalli diversi. Se la temperatura non scende come previsto, Potresti richiedere di riadattare il termostato o ispezionare i gradi del refrigerante.
Problemi e soluzioni abituali
| Preoccupazione | Possibile causa | Rimedio |
|---|---|---|
| Nessun potere | Collegamenti elettrici, fusibile | Ispezionare le connessioni, Sostituire il fusibile |
| Raffreddamento insufficiente | Refrigerante ridotto, condensatore impuro | Agente di raffreddamento di ricarica, condensatore pulito |
| Perdite d'acqua | Adattati sciolti, tubi danneggiati | Serrare le installazioni, Sostituire i tubi del tubo |
| Rumore | Parti allentate, pompa danneggiata | Elementi protetti, Sostituire la pompa |
Ultimi controlli
Non appena hai effettivamente risolto qualsiasi preoccupazione, Condurre un ultimo assegno eseguendo il refrigeratore per una durata prolungata. Confermare che il sistema è sicuro, con livelli di temperatura coerenti e senza problemi persistenti. I controlli di manutenzione e routine regolari aiuteranno a mantenere il tuo refrigeratore d'acqua in condizioni di lavoro eccezionali.
Prima della partita
Come costruire un refrigeratore d'acqua?
Selezione dei componenti giusti per il tuo refrigeratore d'acqua
Quando si sviluppa un frigorifero per l'acqua, Scegliere le parti adeguate è essenziale per assicurarsi l'efficacia, integrità, e durata. Il processo inizia con la comprensione delle richieste dei dettagli della tua applicazione, come la capacità di raffreddamento ricercato, La quantità di acqua da raffreddare, e i problemi ecologici ambientali.
Le parti chiave di un frigorifero d'acqua sono costituite dal compressore, condensatore, Evaporatore, Shutoff di espansione, e refrigerante. Ogni parte svolge una funzione essenziale nel ciclo di refrigerazione:
| Componente | Riepilogo | Fattori da considerare |
|---|---|---|
| Compressore | Comprime il refrigerante e lo distribuisce tramite il sistema. | Scegli tra reciproco, rotante, pergamena, o tipi di viti in base all'efficacia e alle richieste di abilità. |
| Condensatore | Dissipa il calore dal refrigerante all'ambiente circostante. | Le alternative sono costituite da aria raffreddate o raffreddate ad acqua; Seleziona in base ai problemi ambientali e ai requisiti di raffreddamento. |
| Evaporatore | Prende il fuoco dall'acqua, Creazione dell'agente di raffreddamento per vaporizzare. | Piatto, shell-and-tube, o i tipi di bobina sono prontamente disponibili; Scegli in base alle restrizioni della stanza e all'efficacia dello scambio di calore. |
| Valvola di espansione | Controlla la circolazione del refrigerante nell'evaporatore, Ridurre la sua stress e la sua temperatura. | Termostatico, digitale, e le alternative del tubo capillare sono comuni; Seleziona in base alla precisione e al tempo di azione. |
| Refrigerante | Trasferisce il calore all'interno del sistema attraverso le modifiche di fase. | Considera l'effetto ecologico, efficienza, e compatibilità con i componenti del sistema quando si sceglie il tipo. |
Insieme a questi elementi primari, Parti complementari come le pompe, Filtri, e i carri armati sono fondamentali per assicurarsi che il funzionamento e la manutenzione fluidi. Raccogliendo di alta qualità, I componenti compatibili sono fondamentali per prevenire guasti regolari e inefficaci. Inoltre, Considerando la semplicità di approvvigionamento di parti di sostituzione e l'accessibilità del supporto tecnico per ciascun componente può influire sostanzialmente sul successo a lungo termine del tuo Chiller d'acqua progetto.
Mettere insieme il telaio e la base
Mettere insieme il telaio e la base
Quando si costruisce un frigorifero d'acqua, Il primo passo essenziale dopo aver selezionato gli elementi è costruire la cornice e la base. Questa struttura fornirà sicuramente l'assistenza e la stabilità necessarie per l'intera unità. Inizia raccogliendo un materiale robusto come alluminio leggero o acciaio inossidabile, compreso per la loro robustezza e resistenza al deterioramento. Assicurati che le dimensioni della struttura soddisfino tutti i componenti, compreso il compressore, condensatore, ed evaporatore, Con spazio adeguato per il flusso d'aria e il mantenimento.
Inizia tagliando l'acciaio in dimensioni richieste per la base e i supporti verticali. Utilizzare un saldatore o bulloni per collegare saldamente i pezzi, Sviluppare una solida struttura rettangolare. È importante verificare che la struttura sia livello e quadrato per impedire qualsiasi tipo di preoccupazione operativa in seguito. Per la sicurezza inclusa, Pensa di impostare le parentesi graffe lungo i lati e la parte inferiore del telaio.
Accanto, Prepara la base in cui si siederanno i componenti. Montare una piattaforma di metallo o di legno all'interno della struttura per fungere da base. Questo sistema deve essere solido adeguato per supportare il peso dei componenti e fornire una base stabile. Salvaguardare la piattaforma alla struttura usando viti o viti, Assicurare che non ci siano movimenti o flessioni.
Quando la base rimane in posizione, Affisse i piedi di gomma o gli ammortizzatori di risonanza alla base della struttura. Questi sicuramente abbassano il rumore e le risonanze, proteggere sia il frigorifero che la superficie su cui poggia. Assicurarsi che i piedi siano equamente distanziati e saldamente attaccati per smettere di ribaltarsi o traballare.
Con la struttura e la base impostati, Eseguire una valutazione dettagliata per convalidare tutte le connessioni sono strette e il framework è stabile. Questa struttura supporterà sicuramente l'assemblaggio intricato del sistema di condizionamento dell'aria, Quindi fare lo sforzo per garantire che sia robusto è importante per il funzionamento di successo del tuo refrigeratore d'acqua.
Mettere insieme il telaio e la base
Quando si tratta di impostare il sistema di raffreddamento per il frigorifero per l'acqua, la precisione e le cure sono fondamentali. Il sistema di raffreddamento è il cuore del refrigeratore, responsabile del mantenimento della temperatura dell'acqua desiderata. Questa sezione delinea le azioni vitali per assicurarsi una configurazione di successo.
1. Posizionare il compressore e il condensatore
Il passaggio iniziale è posizionare correttamente il compressore e il condensatore. Queste parti devono essere messe su una superficie stabile e di grado per ridurre le vibrazioni e il rumore. Garantire che ci sia un'area appropriata intorno a loro per il flusso d'aria e il mantenimento.
2. Montare l'evaporatore
Prossimo, Posizionare l'evaporatore all'interno del dispositivo refrigeratore. L'evaporatore è responsabile di assorbire caldo dall'acqua. Dovrebbe essere fissato in modo sicuro per fermare qualsiasi tipo di movimento durante la procedura. Utilizzo parentesili e viti adatti per assicurarsi che sia saldamente attaccato.
3. Collegamento delle linee del refrigerante
Dopo aver posizionato i componenti principali, Collega le linee del refrigerante. Queste linee porteranno sicuramente l'agente di raffreddamento tra il compressore, condensatore, ed evaporatore. Assicurarsi che tutti i collegamenti siano impermeabili per impedire qualsiasi tipo di perdita di refrigerante, che può mettere in pericolo l'efficacia del sistema.
| Elemento | Collocamento | In conclusione |
|---|---|---|
| Compressore | Superficie sicura e livellata | Consentire spazio per il flusso d'aria |
| Condensatore | Vicino al compressore | Assicurati un ampio flusso d'aria |
| Evaporatore | Unità refrigerata interna | Fissato in modo sicuro |
| Linee refrigerante | Tra compressore, condensatore, ed evaporatore | Connessioni ermetiche |
4. Montare i fan e i soffiatori
Fan e soffiatori sono essenziali per un'efficace dissipazione calda. Imposta queste parti vicino al condensatore per aumentare il movimento dell'aria e il raffreddamento dell'efficacia. Proteggerli nell'area e collegarli all'alimentazione, Garantire che funzionino senza intoppi senza ostacoli.
5. Isolare i componenti
L'isolamento adeguato è fondamentale per evitare la perdita di calore e migliorare l'efficienza. Utilizzo Prodotti di isolamento di prim'ordine per girare attorno alle linee dell'agente di raffreddamento e vari altri componenti. Questo passaggio aiuterà sicuramente a preservare il livello di temperatura desiderato e ridurre l'assunzione di potenza.
6. Esecuzione di un test di perdite
Prima di finalizzare l'installazione, eseguire un test completo di perdita. Ciò comporta l'esame di tutti i collegamenti e giunti per qualsiasi tipo di indicatori di perdita di agente di raffreddamento. Utilizzare un rilevatore di perdite o un servizio SOAP per ispezionare il sistema. Affrontare rapidamente qualsiasi tipo di perdite per garantire prestazioni ideali.
| Azione | Azione | Funzione |
|---|---|---|
| 1 | Impostazione del compressore e del condensatore | Stabilità e ventilazione |
| 2 | Evaporatore del Monte | Assorbimento di calore |
| 3 | Collegare le linee del refrigerante | Assicurati di connessioni chiuse |
| 4 | Imposta follower e soffiatori | Migliorare il flusso d'aria |
| 5 | Proteggere gli elementi | Proteggere dalla perdita di calore |
| 6 | Eseguire l'esame di perdite | Cerca perdite di refrigerante |
Seguendo queste azioni diligentemente, Puoi assicurarti che il sistema di raffreddamento del frigorifero dell'acqua sia impostato correttamente, Portare prestazioni e longevità ottimali dell'unità.
Collegamento delle linee d'acqua
Collegare le linee dell'acqua è un'azione critica nello sviluppo del tuo refrigeratore d'acqua. Include la creazione di linee d'acqua di ingresso e uscita che distribuiranno l'acqua con il sistema di raffreddamento, Fare un certo scambio di calore efficace. Per iniziare, Scegli di alta qualità, tubi robusti che possono sopportare le varianti di sollecitazione e temperatura normali nei frigoriferi dell'acqua.
Inizia attaccando la linea di acqua di ingresso alla fonte d'acqua. Garantire che il collegamento sia sicuro e privo di perdite utilizzando raccordi e morsetti adeguati. Accanto, Collegare la linea di acqua di uscita al punto di scarico del sistema di raffreddamento, Assicurarsi che il percorso sia dritto e totalmente libero da qualsiasi tipo di nodi o ostacoli che potrebbero impedire la circolazione dell'acqua.
Quando si trasmette le linee dell'acqua, Prendi in considerazione il formato del tuo refrigeratore e il posizionamento dei componenti per ridurre le curve e le dimensioni. Ciò assiste mantengono i prezzi del flusso ideale e riduce la minaccia di calo dello stress. Prodotti di schermatura dell'utilizzo ove richiesto per fermare il guadagno di calore dagli ambienti, che può influire sulle prestazioni del frigorifero.
Dopo aver sviluppato i collegamenti primari, Valuta tutti i giunti e le connessioni per le perdite. È una buona idea utilizzare un sigillante o un nastro in teflon su raccordi filettati per migliorare la tenuta ed evitare qualsiasi tipo di potenziale perdite. Quando tutti i collegamenti sono protetti, Riempi gradualmente il sistema con acqua, Osservando ogni giunto per qualsiasi tipo di indicatori di perdita. Stringere le installazioni come richiesto per garantire una configurazione a stretto acqua.
Alla fine, integrare un misuratore di circolazione e un indicatore di pressione nel sistema per tenere traccia e mantenere la portata e la pressione desiderate. Questi strumenti sono importanti per la procedura in corso e la manutenzione del tuo refrigeratore d'acqua, Offrire dati in tempo reale per garantire che tutto funziona senza intoppi. Ispezionare abitualmente queste metriche e riadattare come essenziale per mantenere un'efficienza ottimale.
Cablaggio elettrico e configurazione elettrica
Assicurandosi che tutti gli elementi elettrici siano valutati per la tensione e esistenti, certamente si trascino. Questo include l'alimentazione, interruttori, comunica, e qualsiasi tipo di cablaggio di controllo.
Posizionare l'unità di alimentazione (PSU) Sicuro nel framework, Garantire che ha un flusso d'aria adeguato per smettere di diventare troppo caldo. Attacca il PSU a una fonte di alimentazione ideale, assicurarsi di utilizzare fili correttamente classificati per affrontare il presente. Normalmente, Un frigorifero richiederà un PSU con un risultato di 12V o 24 V, A seconda delle specifiche del sistema di raffreddamento.
Accanto, Installa l'interruttore principale e qualsiasi tipo di pulsanti di controllo aggiunti. Questi devono essere convenientemente disponibili e chiaramente identificati. Per la sicurezza inclusa, consistono in un fusibile o un interruttore tra l'alimentazione e il resto del sistema per proteggerti dai sovraccarichi elettrici. L'adesione al tavolo espone la scala del filo suggerita per vari punteggi presenti:
| Attuale (Amplificatori) | Indicatore del filo (Awg) |
|---|---|
| Fino a 10a | 16 Awg |
| 10UN – 20UN | 14 Awg |
| 20UN – 30UN | 12 Awg |
Dopo aver stabilito i pulsanti, Continua a filare i refrigeratori dell'acqua. Questo è generalmente costituito dalla pompa, fan, e unità di rilevamento della temperatura. Assicurarsi che ogni componente sia collegato all'alimentazione e agli interruttori di controllo. Utilizzare connettori a cavo o giunti di saldatura per rendere alcuni collegamenti sicuri, sicuri e stabili, e scudo tutti i circuiti rivelati con tubi di restringimento caldi o nastro elettrico.
Per il sistema di controllo, È possibile utilizzare un termostato o un microcontrollore per gestire il livello di temperatura. Collegare i sensori del livello di temperatura agli ingressi del sistema di controllo, e il controllo risulta al relè o al transistor che attiva gli elementi di raffreddamento. Verificare che il sistema di controllo sia configurato correttamente per mantenere l'array di livello di temperatura preferito.
Finalmente, eseguire un'ampia ispezione di tutti i collegamenti elettrici ed elementi. Assicurarsi che tutte le connessioni siano sicure, e non ci sono cavi soggetti che potrebbero causare cortocircuiti. Utilizzare le connessioni del cavo per disporre in modo ordinato il cablaggio e arrestare qualsiasi tipo di disconnessioni accidentali.
Non appena il cablaggio è completo, Accendi sul sistema e verifica eventuali indicazioni di problemi elettrici, come surriscaldamento di cavi o interruttori di circuiti inciampato. Monitorare il sistema molto da vicino durante l'operazione iniziale per garantire qualsiasi caratteristica come significato.
Controllare e risolvere i problemi del tuo refrigeratore d'acqua
Dopo aver assemblato il frigorifero dell'acqua, Test e fissaggio sono azioni critiche per garantire l'efficienza e l'affidabilità ideali. Rispettare questi standard per controllare e affrontare metodicamente qualsiasi tipo di problema con il sistema.
Test iniziali
Inizia riempiendo il serbatoio con acqua e alimentando il refrigeratore. Osserva il sistema per qualsiasi tipo di problema immediato come perdite o suoni insoliti. Confermare che l'acqua circola correttamente e che il sistema di condizionamento dell'aria si sta impegnando.
| Esame | Risultato anticipato |
|---|---|
| Ispezione visiva | Nessuna perdita, collegamenti protetti |
| Accendi | Procedura regolare, Nessun rumori insoliti |
| Circolazione dell'acqua | Circolazione costante |
| Attivazione del sistema di condizionamento dell'aria | Declino della temperatura in acqua |
Controllo delle prestazioni
Visualizza il refrigeratore per un periodo più lungo per assicurarsi che mantenga il livello di temperatura ricercato. Utilizzare un termometro per controllare il livello di temperatura dell'acqua a intervalli diversi. Se la temperatura non scende come previsto, Potresti richiedere di riadattare il termostato o ispezionare i gradi del refrigerante.
Problemi e soluzioni abituali
| Preoccupazione | Possibile causa | Rimedio |
|---|---|---|
| Nessun potere | Collegamenti elettrici, fusibile | Ispezionare le connessioni, Sostituire il fusibile |
| Raffreddamento insufficiente | Refrigerante ridotto, condensatore impuro | Agente di raffreddamento di ricarica, condensatore pulito |
| Perdite d'acqua | Adattati sciolti, tubi danneggiati | Serrare le installazioni, Sostituire i tubi del tubo |
| Rumore | Parti allentate, pompa danneggiata | Elementi protetti, Sostituire la pompa |
Ultimi controlli
Non appena hai effettivamente risolto qualsiasi preoccupazione, Condurre un ultimo assegno eseguendo il refrigeratore per una durata prolungata. Confermare che il sistema è sicuro, con livelli di temperatura coerenti e senza problemi persistenti. I controlli di manutenzione e routine regolari aiuteranno a mantenere il tuo refrigeratore d'acqua in condizioni di lavoro eccezionali.
A proposito di ciò che è autore

Benvenuti nel nostro blog! Il mio nome è Peter e sono l'autore principale di questo blog. Come professionista di recupero sportivo e con profondi interessi e competenze.
Mi impegno a presentare concetti complessi in modo chiaro e conciso, e consentire ai lettori di comprendere meglio e applicare tale conoscenza attraverso una ricerca approfondita e la condivisione dell'esperienza.
Grazie per la lettura e per il tuo supporto! Se hai domande o suggerimenti su uno qualsiasi dei contenuti, Non esitate a contattarmi. Non vedo l'ora di condividere informazioni più interessanti e utili con te e di crescere insieme in questo viaggio di conoscenza!