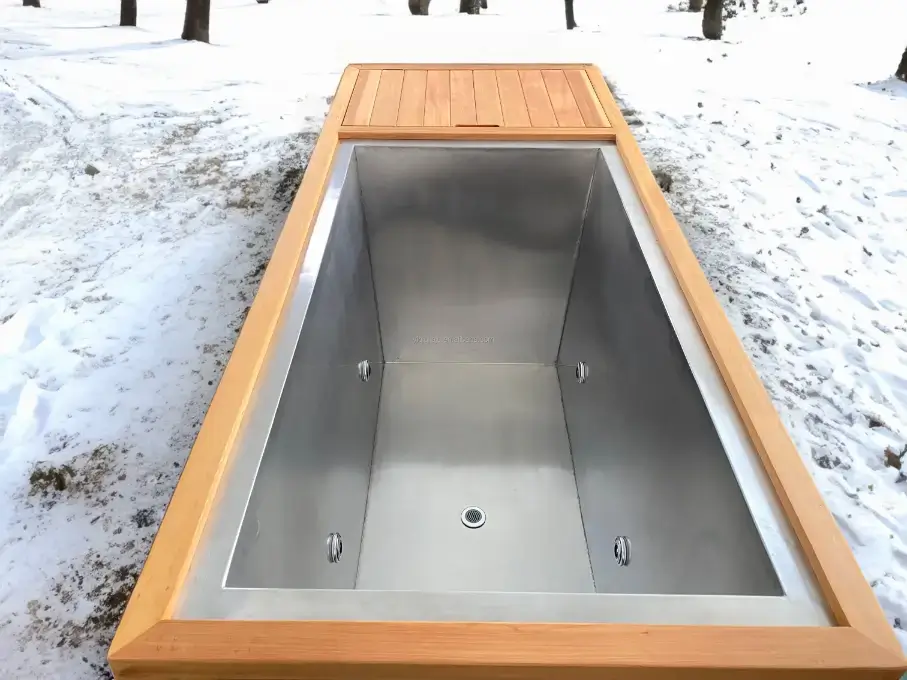
Comment prendre un bain de glace DIY à la maison?
Comment prendre un bain de glace DIY à la maison?
Lorsque vous prévoyez d'inclure un bain de glace de bricolage dans votre habituel, La première décision cruciale consiste à décider du conteneur approprié. Une baignoire appropriée doit être durable, avoir une zone suffisante pour s'adapter efficacement à votre cadre, et maintenez la température de l'eau avec succès. La sélection de baignoires en grande partie repose dans votre zone à avoir, finances, et des options personnelles. Voici les styles de bacs les plus courants utilisés pour les bains de glace, aux côtés de leurs caractéristiques clés.
Points clés:
- – Choisir le bon récipient est crucial pour un bain de glace bricolage.
- – Guide étape par étape pour mettre en place un bain de glace bricolage à la maison.
- – Conseils pour maintenir la température de l'eau idéale.
- – Lignes directrices de sécurité pour l'utilisation d'un bain de glace à la maison.
- – Accessoires pour améliorer votre expérience de bain de glace bricolage.
- – Nettoyez et stockez efficacement votre configuration de bain de glace bricolage.
Choisir le bon récipient pour votre bain de glace bricolage
Lorsque vous prévoyez d'inclure un bain de glace de bricolage dans votre habituel, La première décision cruciale consiste à décider du champ approprié. Une baignoire appropriée doit être durable, avoir une zone suffisante pour s'adapter efficacement à votre cadre, et maintenez la température de l'eau avec succès.
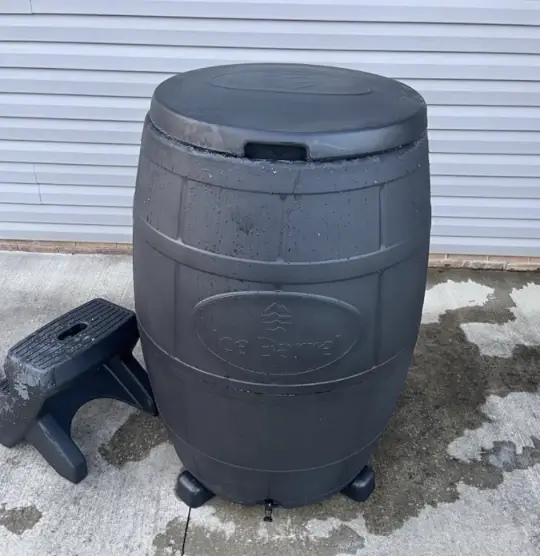
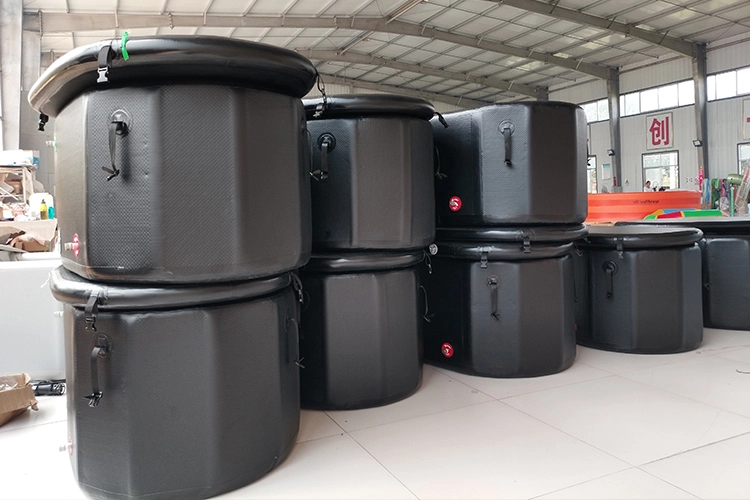
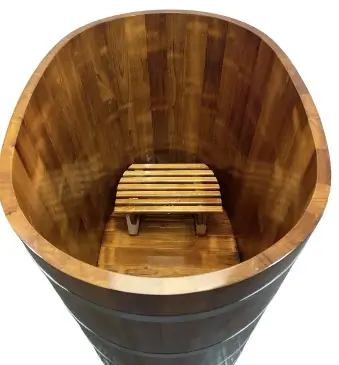
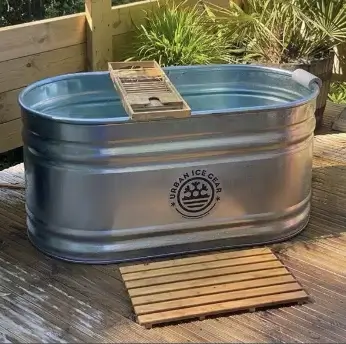
La sélection du conteneur en grande partie repose dans votre zone à avoir, finances, et des options personnelles. Voici les styles de boîtes les plus courants utilisés pour les bains de glace, aux côtés de leurs caractéristiques clés:
| Taper | matériel | Spécificités | Inconvénients |
| Bacs en plastique | Plastique | À un prix inférieur, léger | Peut se fissurer à des températures élevées |
| Bacs gonflables | Tissu brossé en PVC | Portable | Plusieurs réparations après une fuite peuvent affecter l'efficacité |
| Bacs en bois | Bois | Longue durée, | Le bois est sujet à la moisissure et à la moisissure |
| Bacs à métaux | Métal | Propre et hygiénique, facile à nettoyer | Pas facilement stabilisé |
| Bacs mélangés | Doublure métallique, coquille de bois | Longue durée, propre et hygiénique, facile à nettoyer | Cher |
Tout en choisissant un champ, il est essentiel de ne pas oublier la capacité de charge, en particulier au cas où vous prévoyez de comporter des quantités substantielles de glace ou de refroidisseur d'eau sur le côté de l'eau. Assurez-vous que le conteneur peut aider le poids mixte sans se déformer ou casser. De plus, Pour ceux qui réalisent l'esthétique ou ont des contraintes d'espace uniques, L'apparence et les dimensions du conteneur peuvent jouer une position cruciale pour votre technique de choix.
La conservation d'une expérience de bain de glace en premier appelle un récipient qui n'est pas le mieux réaliste mais complète en outre votre style de vie. Que vous choisissiez ou non une baignoire en plastique facile ou un système de baignoire portable de glace extra sophistiqué, Assurez-vous qu'il répond à vos désirs pour la robustesse, longueur, et isolation thermique.
Finalement, N'oubliez pas la commodité du nettoyage et du stockage. Quelques conteneurs d'emballage sont moins difficiles à drainer et faciles que d'autres, qui peut être un problème de découverte si vous utilisez fréquemment la baignoire sur glace. La portabilité peut également être cruciale si vous souhaitez déplacer ou garder le terrain alors qu'il n'est pas utilisé.
Guide étape par étape pour mettre en place votre bain de glace de bricolage
La mise en place d'un bain de glace bricol. Que vous soyez un athlète à la recherche d'une récupération musculaire ou que vous essayiez réellement de bénéficier des résultats revigorants de l'immersion à froid, Le système de configuration est critique. Voici un guide en profondeur pour vous aider à configurer votre propre baignoire.
1. Décider du voisin droit
D'abord, Choisissez une zone qui peut aider le poids d'un bain de glace complet et est proche d'une source d'eau. Un cadre extérieur est correct car il empêche toute capacité de nuire à l'eau aux planchers intérieurs et rend le drainage moins difficile. Assurez-vous que l'endroit est plat et fort.
2. Préparer le récipient de baignoire
Dès que le voisinage est prêt, Préparez votre boîte, qui peut être une baignoire massive, un bac en plastique robuste, Ou peut-être une baignoire de bain de glace dédiée conçue pour une utilisation répétée. Assurez-vous qu'il est facile et libre de tous les débris.
3. Remplir la boîte
Remplissez la boîte avec de l'eau du robinet d'eau à environ 3 quarts de sa capacité. La quantité d'eau doit être suffisante pour immerger votre cadre autant que le cou tout en étant assis. Utilisez un tuyau pour la commodité et les performances du temps.
4. Ajouter de la glace(Allumer le refroidisseur)
Remplissez la boîte avec de l'eau du robinet d'eau à environ 3 quarts de sa capacité. La quantité d'eau doit être suffisante pour immerger votre cadre autant que le cou tout en étant assis. Utilisez un tuyau pour la commodité et les performances du temps.
Si vous avez un refroidisseur, vous pouvez enregistrer ces opérations et l'allumer.
5. Réglage de la température
Utilisez un thermomètre pour vérifier la température de l'eau. Laissez quelques minutes pour que la glace rejette soigneusement l'eau et régule la température en incluant une glace supplémentaire ou une petite quantité d'eau chaude si vous le souhaitez. Ou contrôlez votre refroidisseur d'eau via une application mobile.
6. Dispositions finales
Plus tôt que d'entrer dans le bain de glace, Assurez-vous que vous avez une minuterie, serviette, et des vêtements chauds à proximité. Il est encouragé à restreindre le temps d'immersion pour 10-15 min, spécifiquement pour les novices. Généralement assemblé pour sortir la baignoire en toute sécurité en utilisant un guide comme une main courante ou à proximité des luminaires.
En suivant ces étapes, Votre baignoire de bricolage peut être installée efficacement, Vous permettant de vous délecter des avantages de la thérapie sans sang dans le confort de votre maison privée.
Conseils pour maintenir la température de l'eau idéale
Préserver la meilleure température de l'eau pour votre bain de glace bricolage est crucial pour maximiser ses bénédictions tout en s'assurant que la sécurité. Voici de nombreuses directives pratiques pour vous aider à acquérir et à maintenir la bonne température:
1. Surveillance de la température de l'eau
Testez régulièrement la température de votre baignoire. Intention pour une température de l'eau entre 3 ° C et 12 ° C, Comme cette variété est généralement prise en considération la plus prudente pour la thérapie de bain de glace.
2. Ajustement des quantités de glace
La quantité de glace recherchée peut aller principalement sur la température préliminaire de l'eau et les situations ambiantes. Commencez par une dimension initiale de la température de l'eau et téléchargez de la glace progressivement. Voici une directive facile:
| Température débutante de l'eau | Glace / gallon |
| 60° F (15.Cinq ° C) | 0.3 Kg |
| 70° F (21°C) | 0.5 kg |
| 80° F (26.5°C) | 0.8 kg |
3. Utilisation de stratégies d'isolation
Pour éviter la température rapide à la hausse, Isultez votre récipient de bain. L'utilisation de couvercles d'isolation ou d'enveloppement à l'extérieur du conteneur avec des couvertures d'isolation peut largement lent dans la flèche en raison de la chaleur externe.
4. Glace propre périodiquement
Tout au long des séances prolongées, ou les jours particulièrement chauds, Il pourrait être important de présenter de la glace supplémentaire pour maintenir la meilleure température. Réveillez la température toutes les cinq à 10 minutes et téléchargez de la glace comme recherché.
5. Pré-refroidir l'eau
Pour une configuration plus rapide, pré-refroidir l'eau en stockant le récipient de baignoire rempli d'eau dans un voisinage fabuleux, comme un voisin ombré ou un intérieur s'il est viable, Plus tôt que l'ajout de la glace. Cette méthode réduit la quantité préliminaire de glace requise.
Via le suivi de ces recommandations, Vous pouvez conserver la température précise de l'eau dans votre baignoire de bricolage, Améliorer votre délec et maximiser les avantages thérapeutiques.
Ps: Si vous avez un refroidisseur d'eau Acheté chez Harman N, vous pouvez dire au revoir aux étapes lourdes ci-dessus, Réglez simplement votre température 3 quelques heures plus tard, vous pouvez profiter du bain de glace que vous voulez, Le contrôle thermostatique est plus durable !!!!!
Comment nettoyer et stocker efficacement votre configuration de bain de glace bricolage?
Garder la propreté et le garage droit de votre configuration de baignoire de bricolage est essentiel pour assurer la ténacité et les performances avant tout. Ici, Je vous manuel à travers les pratiques de première classe pour nettoyer et stocker votre baignoire sur glace après chaque utilisation.
Nettoyer votre baignoire
Après chaque bain de votre baignoire, Il est crucial de suivre un nettoyage intensif ordinaire pour empêcher l'accumulation de bactéries et d'algues, en particulier au cas où vous utilisez une piscine portable ou une grande boîte. Commencez par vidange tout de suite toute l'eau après utilisation. Une fois vidé, Frottez les surfaces avec un léger désinfectant ou une solution de blanchiment et d'eau (un rapport de un:10 est généralement puissant). Rincez la boîte soigneusement avec de l'eau propre pour supprimer tous les résidus de l'agent nettoyant.
Séchage
Après le nettoyage, Assurez-vous que la boîte est complètement sèche plus tôt que le garage pour vous sauver de la moisissure et des odeurs. Si possible, Lancez-le à l'intérieur du solaire pendant quelques heures ou séchez-le manuellement avec une serviette. Pour le stockage, trouver un cool, lieu sec loin de la lumière directe du soleil pour éviter tout dommage au matériau du champ. Dans le cas où vous utilisez un modèle pliable, Assurez-vous que toutes les pièces sont sèches et bien pliées. Éloignez-vous de mettre des objets lourds sur le sommet du conteneur stocké pour le maintenir en forme souhaitable.
Chiller de Harman N a 4 Couches de protection pour assurer de l'eau potable.
- Le maillage externe en acier inoxydable empêche les grandes particules d'entrer dans les baignoires
- Cartouche de filtre PP pour filtration détaillée de poussière de poudre
- Le générateur d'ozone produit constamment de l'ozone pour éliminer rapidement les micro-organismes
- Irradiateur de lumière ultraviolette pour une suppression supplémentaire.
Harman N veut que tous les amateurs de bain de glace s'amuser plus sur un budget limité.
Remplissez vos coordonnées pour explorer les meilleures options de bain de glace pour vous avec un manager de Harman N!
L'affaire devant lui
Comment prendre un bain de glace DIY à la maison?
Lorsque vous prévoyez d'inclure un bain de glace de bricolage dans votre habituel, La première décision cruciale consiste à décider du conteneur approprié. Une baignoire appropriée doit être durable, avoir une zone suffisante pour s'adapter efficacement à votre cadre, et maintenez la température de l'eau avec succès. La sélection de baignoires en grande partie repose dans votre zone à avoir, finances, et des options personnelles. Voici les styles de bacs les plus courants utilisés pour les bains de glace, aux côtés de leurs caractéristiques clés.
Points clés:
- – Choisir le bon récipient est crucial pour un bain de glace bricolage.
- – Guide étape par étape pour mettre en place un bain de glace bricolage à la maison.
- – Conseils pour maintenir la température de l'eau idéale.
- – Lignes directrices de sécurité pour l'utilisation d'un bain de glace à la maison.
- – Accessoires pour améliorer votre expérience de bain de glace bricolage.
- – Nettoyez et stockez efficacement votre configuration de bain de glace bricolage.
Choisir le bon récipient pour votre bain de glace bricolage
Lorsque vous prévoyez d'inclure un bain de glace de bricolage dans votre habituel, La première décision cruciale consiste à décider du champ approprié. Une baignoire appropriée doit être durable, avoir une zone suffisante pour s'adapter efficacement à votre cadre, et maintenez la température de l'eau avec succès.
La sélection du conteneur en grande partie repose dans votre zone à avoir, finances, et des options personnelles. Voici les styles de boîtes les plus courants utilisés pour les bains de glace, aux côtés de leurs caractéristiques clés:
| Taper | matériel | Spécificités | Inconvénients |
| Bacs en plastique | Plastique | À un prix inférieur, léger | Peut se fissurer à des températures élevées |
| Bacs gonflables | Tissu brossé en PVC | Portable | Plusieurs réparations après une fuite peuvent affecter l'efficacité |
| Bacs en bois | Bois | Longue durée, | Le bois est sujet à la moisissure et à la moisissure |
| Bacs à métaux | Métal | Propre et hygiénique, facile à nettoyer | Pas facilement stabilisé |
| Bacs mélangés | Doublure métallique, coquille de bois | Longue durée, propre et hygiénique, facile à nettoyer | Cher |
Tout en choisissant un champ, il est essentiel de ne pas oublier la capacité de charge, en particulier au cas où vous prévoyez de comporter des quantités substantielles de glace ou de refroidisseur d'eau sur le côté de l'eau. Assurez-vous que le conteneur peut aider le poids mixte sans se déformer ou casser. De plus, Pour ceux qui réalisent l'esthétique ou ont des contraintes d'espace uniques, L'apparence et les dimensions du conteneur peuvent jouer une position cruciale pour votre technique de choix.
La conservation d'une expérience de bain de glace en premier appelle un récipient qui n'est pas le mieux réaliste mais complète en outre votre style de vie. Que vous choisissiez ou non une baignoire en plastique facile ou un système de baignoire portable de glace extra sophistiqué, Assurez-vous qu'il répond à vos désirs pour la robustesse, longueur, et isolation thermique.
Finalement, N'oubliez pas la commodité du nettoyage et du stockage. Quelques conteneurs d'emballage sont moins difficiles à drainer et faciles que d'autres, qui peut être un problème de découverte si vous utilisez fréquemment la baignoire sur glace. La portabilité peut également être cruciale si vous souhaitez déplacer ou garder le terrain alors qu'il n'est pas utilisé.
Guide étape par étape pour mettre en place votre bain de glace de bricolage
La mise en place d'un bain de glace bricol. Que vous soyez un athlète à la recherche d'une récupération musculaire ou que vous essayiez réellement de bénéficier des résultats revigorants de l'immersion à froid, Le système de configuration est critique. Voici un guide en profondeur pour vous aider à configurer votre propre baignoire.
1. Décider du voisin droit
D'abord, Choisissez une zone qui peut aider le poids d'un bain de glace complet et est proche d'une source d'eau. Un cadre extérieur est correct car il empêche toute capacité de nuire à l'eau aux planchers intérieurs et rend le drainage moins difficile. Assurez-vous que l'endroit est plat et fort.
2. Préparer le récipient de baignoire
Dès que le voisinage est prêt, Préparez votre boîte, qui peut être une baignoire massive, un bac en plastique robuste, Ou peut-être une baignoire de bain de glace dédiée conçue pour une utilisation répétée. Assurez-vous qu'il est facile et libre de tous les débris.
3. Remplir la boîte
Remplissez la boîte avec de l'eau du robinet d'eau à environ 3 quarts de sa capacité. La quantité d'eau doit être suffisante pour immerger votre cadre autant que le cou tout en étant assis. Utilisez un tuyau pour la commodité et les performances du temps.
4. Ajouter de la glace(Allumer le refroidisseur)
Remplissez la boîte avec de l'eau du robinet d'eau à environ 3 quarts de sa capacité. La quantité d'eau doit être suffisante pour immerger votre cadre autant que le cou tout en étant assis. Utilisez un tuyau pour la commodité et les performances du temps.
Si vous avez un refroidisseur, vous pouvez enregistrer ces opérations et l'allumer.
5. Réglage de la température
Utilisez un thermomètre pour vérifier la température de l'eau. Laissez quelques minutes pour que la glace rejette soigneusement l'eau et régule la température en incluant une glace supplémentaire ou une petite quantité d'eau chaude si vous le souhaitez. Ou contrôlez votre refroidisseur d'eau via une application mobile.
6. Dispositions finales
Plus tôt que d'entrer dans le bain de glace, Assurez-vous que vous avez une minuterie, serviette, et des vêtements chauds à proximité. Il est encouragé à restreindre le temps d'immersion pour 10-15 min, spécifiquement pour les novices. Généralement assemblé pour sortir la baignoire en toute sécurité en utilisant un guide comme une main courante ou à proximité des luminaires.
En suivant ces étapes, Votre baignoire de bricolage peut être installée efficacement, Vous permettant de vous délecter des avantages de la thérapie sans sang dans le confort de votre maison privée.
Conseils pour maintenir la température de l'eau idéale
Préserver la meilleure température de l'eau pour votre bain de glace bricolage est crucial pour maximiser ses bénédictions tout en s'assurant que la sécurité. Voici de nombreuses directives pratiques pour vous aider à acquérir et à maintenir la bonne température:
1. Surveillance de la température de l'eau
Testez régulièrement la température de votre baignoire. Intention pour une température de l'eau entre 3 ° C et 12 ° C, Comme cette variété est généralement prise en considération la plus prudente pour la thérapie de bain de glace.
2. Ajustement des quantités de glace
La quantité de glace recherchée peut aller principalement sur la température préliminaire de l'eau et les situations ambiantes. Commencez par une dimension initiale de la température de l'eau et téléchargez de la glace progressivement. Voici une directive facile:
| Température débutante de l'eau | Glace / gallon |
| 60° F (15.Cinq ° C) | 0.3 Kg |
| 70° F (21°C) | 0.5 kg |
| 80° F (26.5°C) | 0.8 kg |
3. Utilisation de stratégies d'isolation
Pour éviter la température rapide à la hausse, Isultez votre récipient de bain. L'utilisation de couvercles d'isolation ou d'enveloppement à l'extérieur du conteneur avec des couvertures d'isolation peut largement lent dans la flèche en raison de la chaleur externe.
4. Glace propre périodiquement
Tout au long des séances prolongées, ou les jours particulièrement chauds, Il pourrait être important de présenter de la glace supplémentaire pour maintenir la meilleure température. Réveillez la température toutes les cinq à 10 minutes et téléchargez de la glace comme recherché.
5. Pré-refroidir l'eau
Pour une configuration plus rapide, pré-refroidir l'eau en stockant le récipient de baignoire rempli d'eau dans un voisinage fabuleux, comme un voisin ombré ou un intérieur s'il est viable, Plus tôt que l'ajout de la glace. Cette méthode réduit la quantité préliminaire de glace requise.
Via le suivi de ces recommandations, Vous pouvez conserver la température précise de l'eau dans votre baignoire de bricolage, Améliorer votre délec et maximiser les avantages thérapeutiques.
Ps: Si vous avez un refroidisseur d'eau Acheté chez Harman N, vous pouvez dire au revoir aux étapes lourdes ci-dessus, Réglez simplement votre température 3 quelques heures plus tard, vous pouvez profiter du bain de glace que vous voulez, Le contrôle thermostatique est plus durable !!!!!
Comment nettoyer et stocker efficacement votre configuration de bain de glace bricolage?
Garder la propreté et le garage droit de votre configuration de baignoire de bricolage est essentiel pour assurer la ténacité et les performances avant tout. Ici, Je vous manuel à travers les pratiques de première classe pour nettoyer et stocker votre baignoire sur glace après chaque utilisation.
Nettoyer votre baignoire
Après chaque bain de votre baignoire, Il est crucial de suivre un nettoyage intensif ordinaire pour empêcher l'accumulation de bactéries et d'algues, en particulier au cas où vous utilisez une piscine portable ou une grande boîte. Commencez par vidange tout de suite toute l'eau après utilisation. Une fois vidé, Frottez les surfaces avec un léger désinfectant ou une solution de blanchiment et d'eau (un rapport de un:10 est généralement puissant). Rincez la boîte soigneusement avec de l'eau propre pour supprimer tous les résidus de l'agent nettoyant.
Séchage
Après le nettoyage, Assurez-vous que la boîte est complètement sèche plus tôt que le garage pour vous sauver de la moisissure et des odeurs. Si possible, Lancez-le à l'intérieur du solaire pendant quelques heures ou séchez-le manuellement avec une serviette. Pour le stockage, trouver un cool, lieu sec loin de la lumière directe du soleil pour éviter tout dommage au matériau du champ. Dans le cas où vous utilisez un modèle pliable, Assurez-vous que toutes les pièces sont sèches et bien pliées. Éloignez-vous de mettre des objets lourds sur le sommet du conteneur stocké pour le maintenir en forme souhaitable.
Chiller de Harman N a 4 Couches de protection pour assurer de l'eau potable.
- Le maillage externe en acier inoxydable empêche les grandes particules d'entrer dans les baignoires
- Cartouche de filtre PP pour filtration détaillée de poussière de poudre
- Le générateur d'ozone produit constamment de l'ozone pour éliminer rapidement les micro-organismes
- Irradiateur de lumière ultraviolette pour une suppression supplémentaire.
Harman N veut que tous les amateurs de bain de glace s'amuser plus sur un budget limité.
Remplissez vos coordonnées pour explorer les meilleures options de bain de glace pour vous avec un manager de Harman N!
À propos de l'auteur

Bienvenue sur notre blog! Je m'appelle Peter et je suis l'auteur principal de ce blog. En tant que praticien de la récupération sportive et possédant de profonds intérêts et expertise.
Je m'engage à présenter des concepts complexes de manière claire et concise, et permettre aux lecteurs de mieux comprendre et appliquer ces connaissances grâce à des recherches approfondies et au partage d'expériences.
Merci d'avoir lu et pour votre soutien! Si vous avez des questions ou des suggestions sur l'un des contenus, N'hésitez pas à me contacter. J'ai hâte de partager des informations plus intéressantes et utiles avec vous et de grandir ensemble dans ce voyage de connaissances.!

