Bauen Sie Ihre eigene Fasssauna: Eine Schritt-für-Schritt-Anleitung
Bauen Sie Ihre eigene Fasssauna: Eine Schritt-für-Schritt-Anleitung
Vom Verständnis der Bedeutung von Isolierung und Belüftung bis hin zur Gewährleistung der ordnungsgemäßen Wärmeverteilung, Gebäude a Laufsauna beinhaltet mehr als nur Holzbretter zusammenzubauen. Ich werde auch Tipps zur Integration eines Fass -Sauna -Gehwegs oder Decks für zusätzlichen Komfort und Stil teilen, sowie Ratschläge zur Auswahl von Heizungen, Türen, und Fenster, um Ihre Saunaerlebnis zu verbessern.
Wählen Sie den richtigen Ort für Ihre Fass -Sauna aus
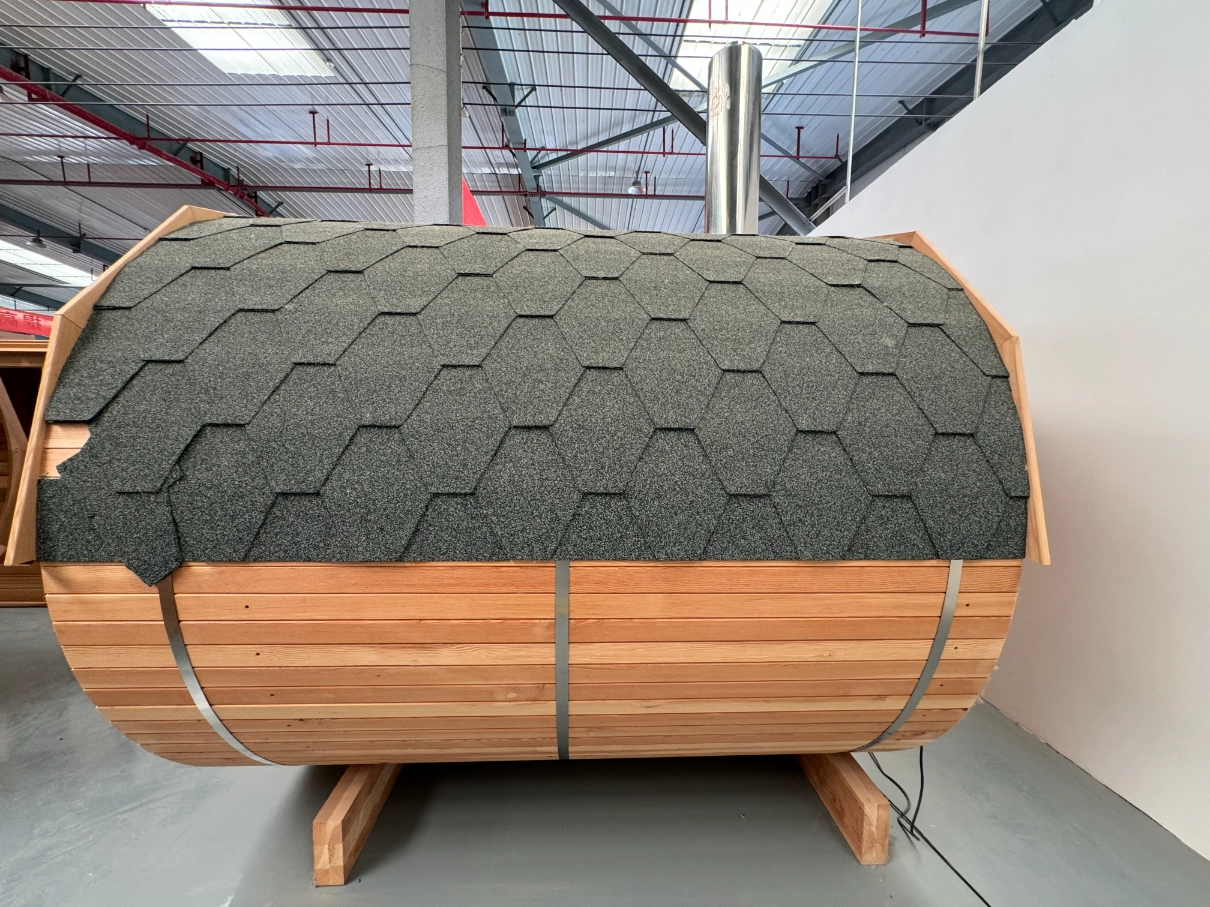
Beim Starten des Projekts, Ihre eigene Fass -Sauna zu konstruieren, Die erste und kritischste Wahl, die Sie treffen werden, ist die Auswahl des richtigen Ortes. Eine Fass -Sauna wird mühelos in ihre Umgebung vermischt, Und der Bereich, in dem Sie es einrichten möchten, wird sowohl seine Leistung als auch den visuellen Charme erheblich beeinflussen.
Denken Sie über Zugänglichkeit und Bequemlichkeit nach
Der Ort Ihrer Laufsauna muss bequem zugänglich sein. Ein Sauna -Deck -Weg oder ein Weg, der direkt zur Sauna führt, Besonders in kälteren Monaten. Vorzugsweise, Sie beabsichtigen, Ihre Sauna in der Nähe Ihres Hauses zu positionieren, Die Gewährleistung des garantierenden, aber auch genügend Platz für persönliche Privatsphäre bietet auch genügend Platz für die Privatsphäre. Berücksichtigung der Nähe zur Residenz, Denken Sie an Bequemlichkeit: Sie werden möchten, dass die Sauna nur einen kurzen Spaziergang entfernt ist, Vor allem, wenn Sie sich darauf vorbereiten, eine Abkühlungssitzung nach der Sauna zu genießen.
Untersuchen Sie die Landschaft und das Gelände
Ein zusätzlicher wichtiger Aspekt ist die Landschaft. Das Gebiet muss in einem Gradbereich sein, der das Gewicht der Struktur aufrechterhalten kann. Eine milde Steigung kann zu Problemen mit Wasserentwässerung führen oder zu einer ungleichen Struktur führen. Wenn Sie Ihre Fass -Sauna setzen, Möglicherweise möchten Sie auch die Notwendigkeit eines Barrel Sauna Sidewalk Decks für die Nutzung der Oberfläche und einbezogen. Stellen Sie sicher, dass das Gelände fest ist, ohne sich bewegende Schmutz oder extreme Nässe. Eine solide Grundlage wird sicherlich die Lebensdauer Ihrer Sauna verlängern und jede Art von nicht benötigten Fixierungen stoppen.
Sonnenlicht und Privatsphäre
Die Sunshine -Exposition spielt eine Rolle bei der Erhaltung der Wirksamkeit der Sauna. Vorzugsweise, Sie müssen einen Ort auswählen, der in den kälteren Monaten reichlich Sonnenlicht erhält. Sonnenlicht hilft dabei, die Innentemperatur der Sauna während des kälteren Klimas zu halten, Minimieren Sie die Grundstücke Ihres Heimheizsystems. Dennoch, Das stabilisierende Sonnenlicht mit Privatsphäre ist ebenso wichtig. Wenn Sie Ihre Sauna zur Entspannung entwickeln, Berücksichtigen Sie einen Ort mit natürlichem Schutz, wie eine Reihe von Bäumen oder einen Zaun, Um eine intime und friedliche Atmosphäre für Ihre Saunaerfahrung zu entwickeln.
Überlegungen zum Wind und Wetter
Wind ist ein weiteres wesentliches Element bei der Auswahl eines Ortes. Sie müssen Orte vermeiden, an denen die Sauna kräftigen Winden enthüllt wird, da dies die Wärmeerhalte und Effektivität beeinflussen kann. Berücksichtigen Sie die Positionierung Ihrer Laufsauna in der Nähe von Windschutzen wie hohen Hecken oder anderen natürlichen Barrieren. Trotzdem, Seien Sie sich einer übermäßigen Nässe oder Entwässerung durch benachbarte Steigungen bewusst, die zu Wasserschäden führen können.
Mischung Material für Ihren Fass -Sauna Build
Beim Beginn der Reise einer Fass -Sauna, Eine der kritischsten Entscheidungen, die Sie treffen werden, ist die Auswahl der besten Produkte. Die Produkte, die Sie wählen, Fähigkeit, und Isolationshäuser.
Holz: Das Herz Ihrer Fass -Sauna
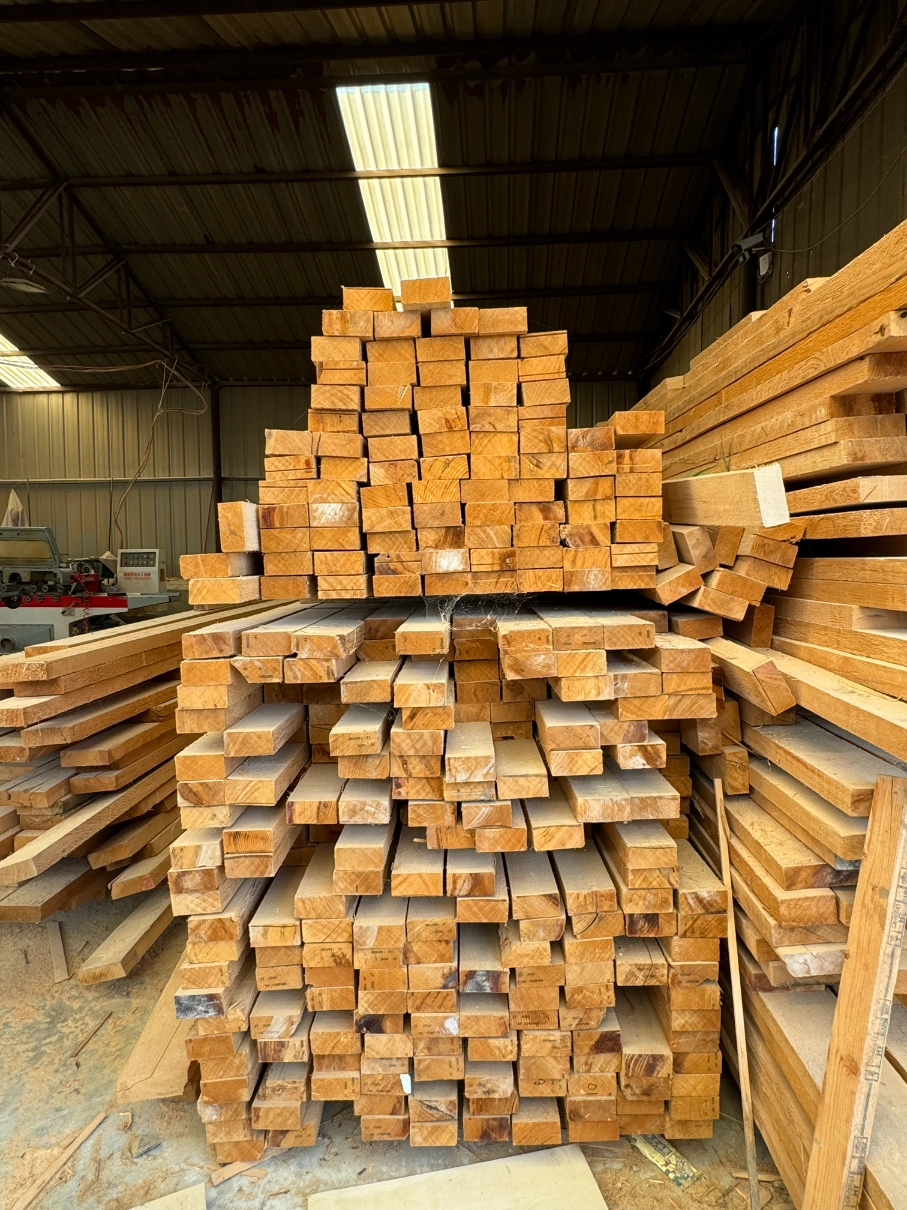
Die Art von Holz, die in Ihrer Fass -Sauna verwendet wird. Standard -Sauna -Wälder wie Zedern, Redwood, und Fichte werden aufgrund ihres Widerstands gegen Feuchtigkeit bevorzugte Auswahlen bevorzugt, Verfall, und die hohen Temperaturen innerhalb der Sauna. Zeder, insbesondere, wird für seinen angenehmen Duft bevorzugt, das steigert die Sauna -Erfahrung. Diese Hölzer können sich auch gegen die schwerwiegenden Veränderungen in der Feuchtigkeits- und Temperaturniveau halten, die während der gesamten Sauna -Sitzungen auftreten.
Während des Holzes pflücken, Es ist sehr wichtig sicherzustellen. Zusätzlich, Top -Kerbe verwenden, Dicke Holzplatten werden die Isolierung sicherlich verbessern und das Warme in der Sauna bewahren.
Isolationsmaterialien für die Energieeffizienz
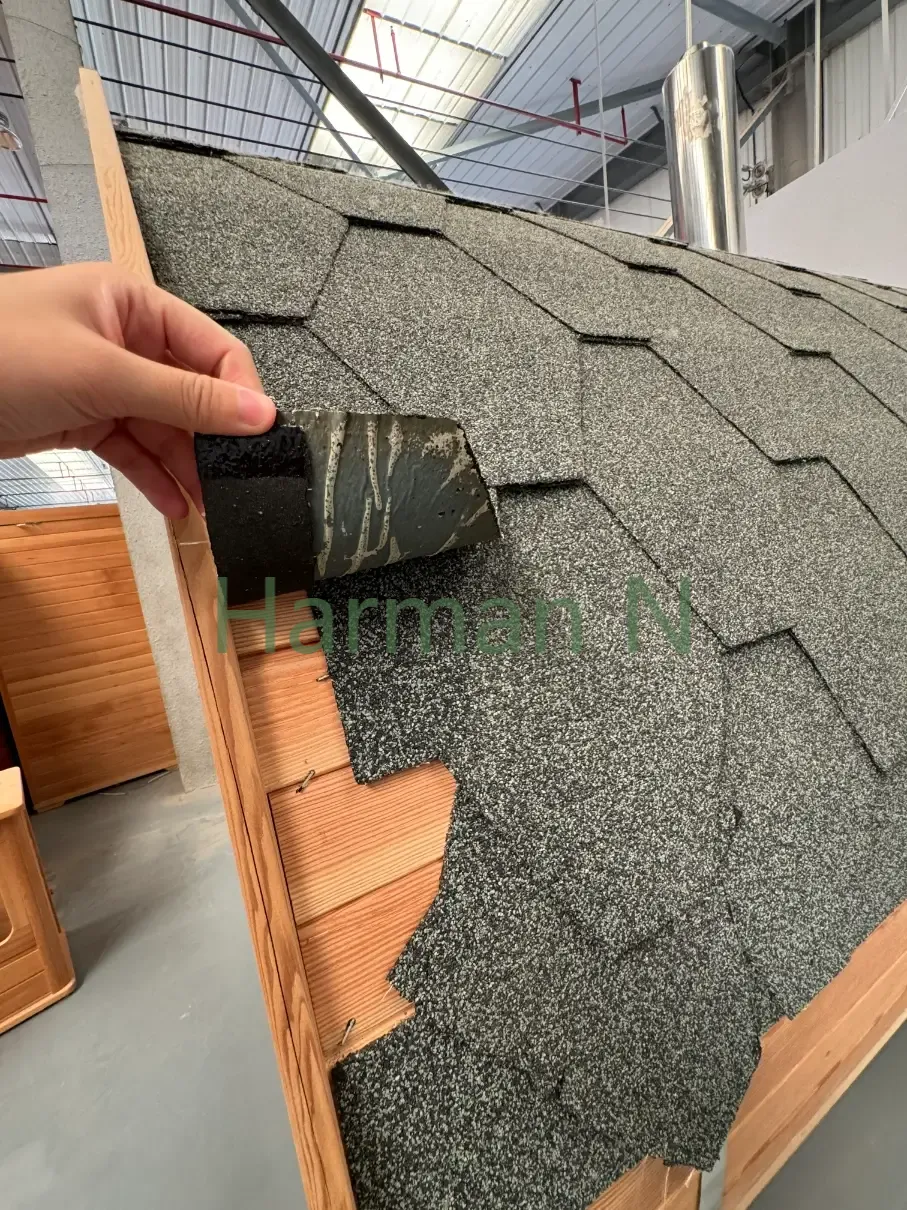
Um sicherzustellen, dass Ihre Laufsauna effizient und energiesparend bleibt, Die Option des Isolierungsprodukts ist unerlässlich. Die häufigsten Materialien für die Isolierung einer Fass -Sauna sind Glasfaser- und Mineralwolle. Diese Produkte arbeiten bei der Erfassung von Warmen und verhindern, dass es entkommt, Dies minimiert zwangsläufig die Leistung, die erforderlich ist.
Zusammen mit den primären Isolationsmaterialien, Die Verwendung reflektierender Aluminiumfolie an den Innenwänden kann zusätzlich die thermische Wirksamkeit der Sauna verbessern, indem er warmer Rücken direkt in die Sauna spiegelt, Bei längerer Dauer heißer beibehalten.
Saunaofen: Auswählen der richtigen Wärmequelle
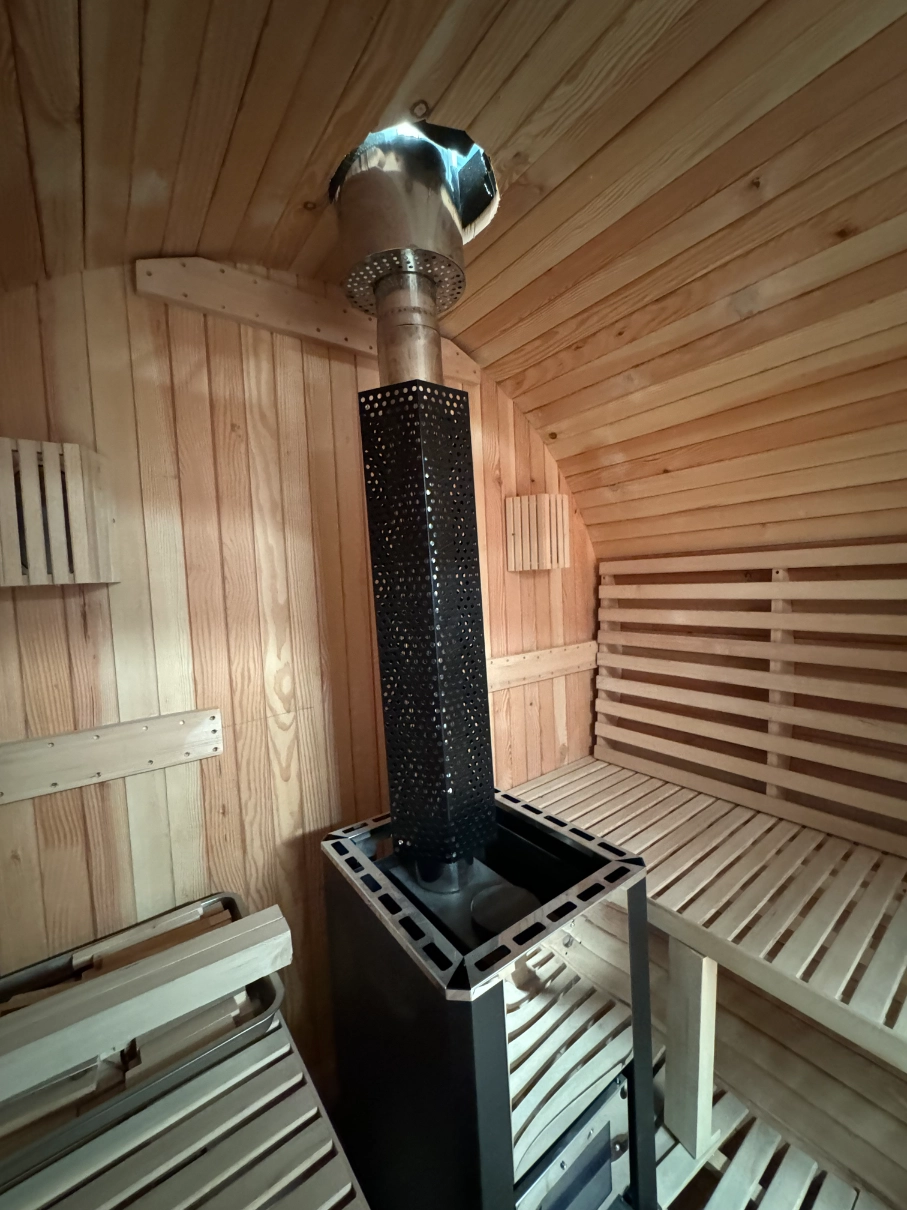
Das Heizsystem ist der Hauptteil Ihrer Laufsauna, Da reguliert es die Temperatur der Sauna. Bei der Auswahl einer Heizeinheit, Sie haben mehrere Möglichkeiten, einschließlich elektrischer, Holzverbrennung, und Gasheizeinheiten. Elektrische Heizeinheiten sind leicht eingerichtet und bieten einen Zeitgenossen an, bequeme Alternative zur Erhaltung des Temperaturniveaus der Sauna. Holzheizsysteme, auf der anderen Seite, Bieten Sie eine echte Erfahrung und können manchmal viel energieeffizienter sein.
Sowie der jugendlichere Favorit, Die Rotlicht erhitzte Sauna ist auch eine ausgezeichnete Wahl.
Bau eines Fass -Sauna -Gehwegs und eines Decks
Ein oft übersehener Aspekt des Bauens einer Fass-Sauna ist das umliegende Deck oder Gehweg. Ein Fass -Sauna -Gehwegdeck ist nicht nur praktisch, sondern verbessert die ästhetische Anziehungskraft der Sauna. Ein robustes und wetterfestes Deck aus Produkten wie Verbundholz oder Zedern ist ideal für die äußere Umgebung. Das Deck fungiert als Platz zum Abkühlen nach einer Sauna -Sitzung oder als Ort, um Handtücher und andere Gegenstände zu positionieren.
Schritt-für-Schritt-Anleitung zum Aufbau des Rahmens Ihrer Fass-Sauna
Der Aufbau der Struktur Ihrer Fass -Sauna ist eine wichtige Aktion, um ihre architektonische Ehrlichkeit und die totale Widerstandsfähigkeit zu gewährleisten. Unten finden Sie eine gründliche Schritt-für-Schritt-Anleitung zum Erstellen der Struktur, die die Struktur Ihrer Sauna erzeugen. The procedure is straightforward, yet focus to information is important for a successful construct.
1. Gather Necessary Tools and Materials
Before you start, make sure you have all the needed devices and products. Below is a checklist of what you will require:
| Tool | Objective |
|---|---|
| Measuring Tape | To measure the wood and ensure exact cuts. |
| Circular Saw | To reduce the wood planks to the proper sizes. |
| Drill | For screwing in the framing parts. |
| Level | To make sure the structure is even and square. |
| Screwdriver | For securing screws right into location. |
2. Plan the Sauna Frame Dimensions
The next action is to determine on the dimensions of the Laufsauna structure. Relying on the size of your sauna, procedure and plan out the following:
- Length: Typically between 6 Und 8 feet for a comfy sauna.
- Width: Normalerweise 5 feet, but it can vary based upon personal preferences.
- Height: Betrachten Sie eine Erhöhung von betreffend 7 Füße für genug Freigabe.
Zusätzlich, Betrachten Sie den Bereich für die Fass -Sauna -Gehwegdeck Wenn Sie beabsichtigen, eine als Komponente Ihres Sauna -Setups zu erstellen. Der Weg kann eine einladende Note und Hilfe bei Sauna Entry/Exit Simplicity umfassen.
3. Konstruieren Sie Allzeiten niedriger Rahmen

Beginnend mit der Konstruktion der unteren Struktur der Sauna. Legen Sie die niedrigeren Assistenzstrahlen auf einer ebenen Oberfläche und schützen Sie sie mit Schrauben. Allzeit niedriger Framework wird sicherlich als Basis der gesamten Struktur funktionieren, Es ist also wichtig, dass es quadratisch und grad ist.
- Legen Sie den Lichtstrahl nebeneinander mit einer gleichwertigen Leere dazwischen.
- Stellen Sie sicher, dass die Struktur angemessen aufgestellt ist.
- Doppelprüfabmessungen vor der Sicherung der Stücke in Position.
4. Assemble the Side Walls
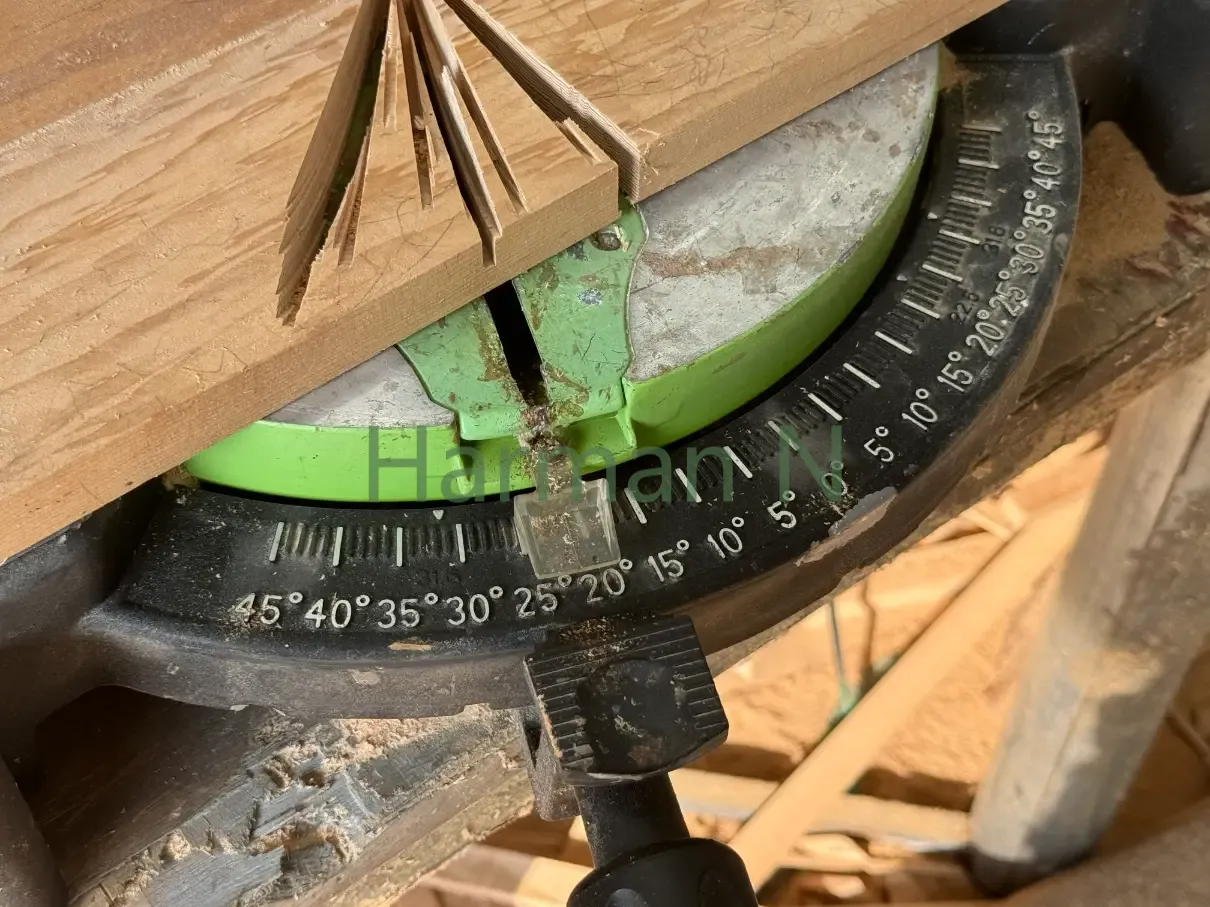
When all-time low structure remains in place, begin assembling the side wall surfaces of the sauna. Start by cutting the side boards to the preferred length and afterwards affix them to the base framework. The walls will be bent, so ensure you account for this when gauging and reducing the boards.
- Use timber strips to develop a mild curve along the boundary of the sauna.
- Connect the boards to the bottom frame with screws, guaranteeing they adhere to the contour evenly.
For additional stability, consider including a sauna deck pathway that links the side walls. This not just contributes to the sauna’s look but also serves as a useful area to stroll along the barrel sauna deck.
5. Reinforce the Frame with Support Beams
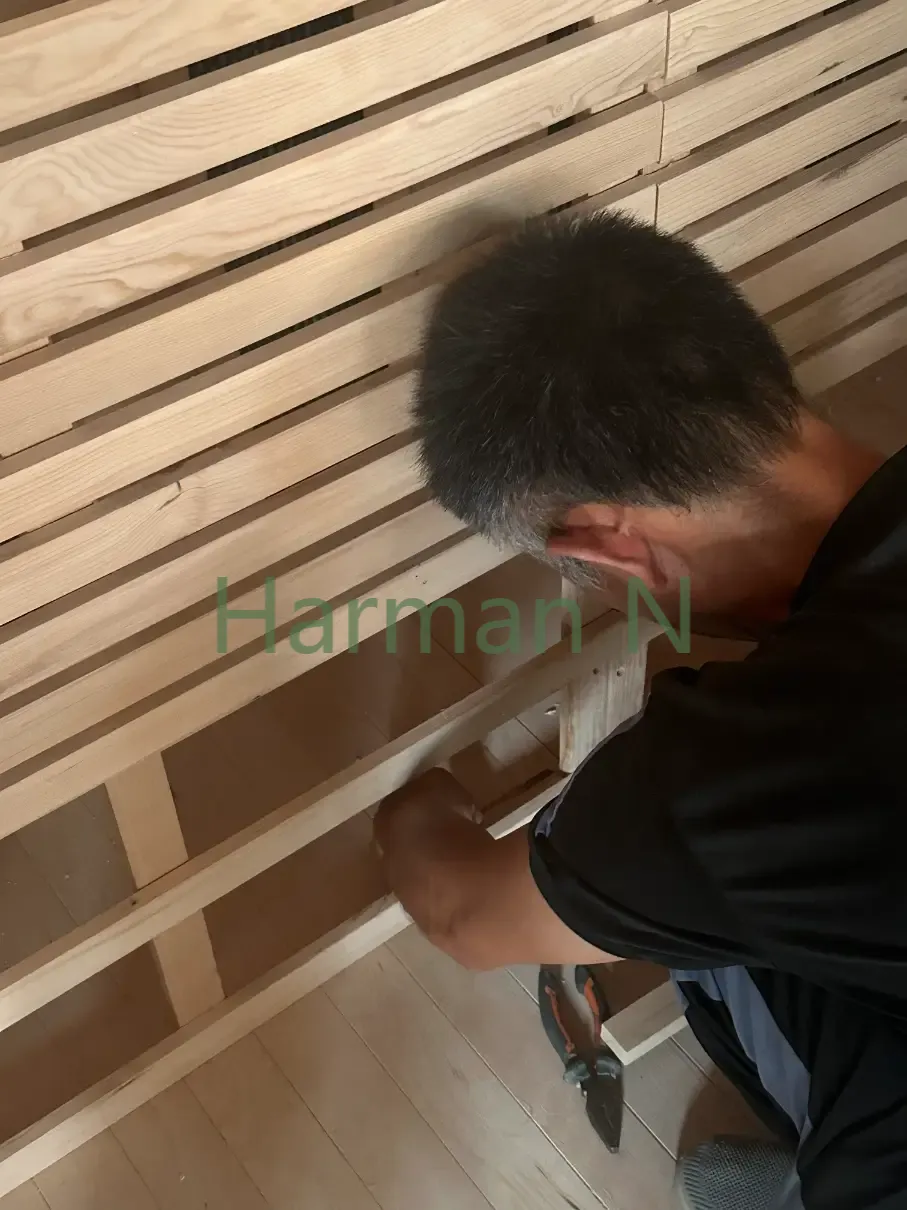
After setting up the side walls, add support light beams across the top of the sauna to reinforce the framework. These beam of lights will supply the required support for the roof and guarantee the wall surfaces remain upright.
- Location assistance beams at regular periods (every 2 Zu 3 feet).
- Protect the light beams to the side wall surfaces and bottom frame with screws.
- Make certain each beam of light is level and appropriately aligned.
6. Attach the Roof Frame
The roofing of the barrel sauna should be designed to comply with the natural contour of the wall surfaces. Begin by developing a structure for the roofing system utilizing slats or beams that will certainly form a supportive framework for the roof materials.
- Make certain the roofing structure is safely affixed to the top of the side wall surfaces making use of screws.
- Look for any spaces or vulnerable points in the roof structure and reinforce them if required.
7. Installing the Final Touches
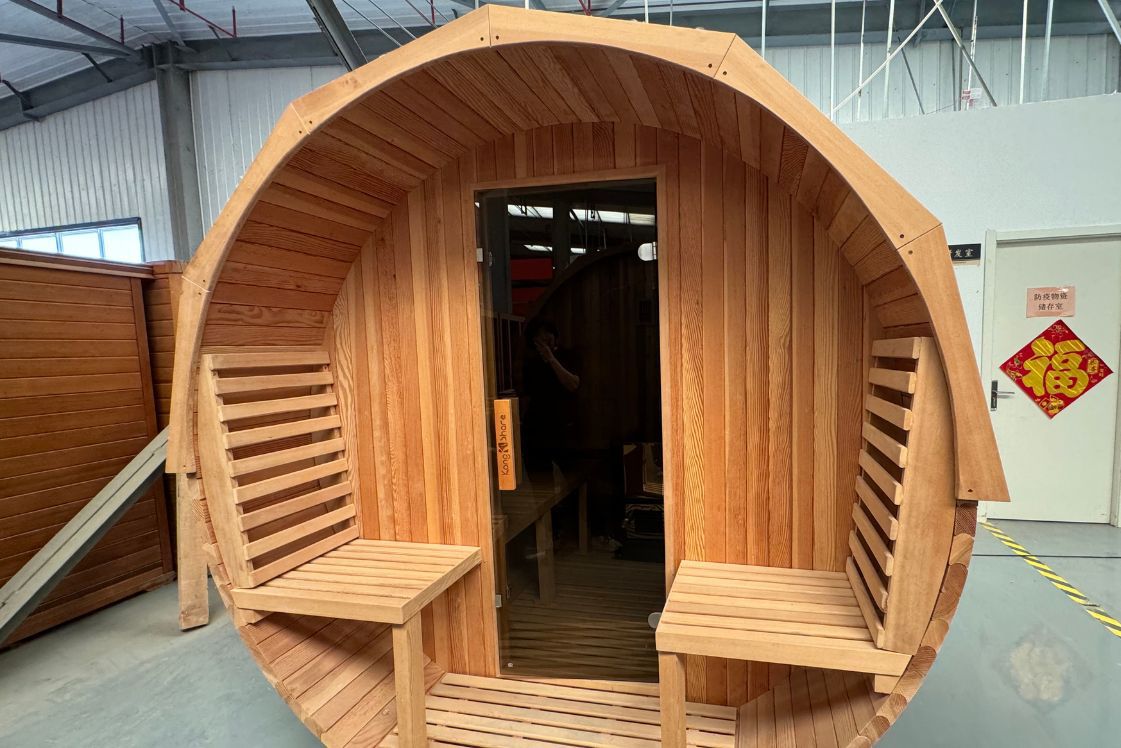
After the major structure is full, you can concentrate on including the ending up touches to the framework. This consists of making sure the barrel sauna deck is correctly constructed to provide an also surface area for strolling and possibly including doors and windows where required.
- Make sure the frame is fully straightened and square before continuing with the outside cladding.
- Double-check that the framework is protected and prepared for insulation and cladding.
| Komponente | Referral |
|---|---|
| Insulation Material | Fiberglass, Mineral Wool, Reflective Foil |
| Consumption Vent Location | Low near the floor |
| Exhaust Vent Location | High near the ceiling |
| Range Between Stove and Vent | A minimum of 2 feet for ideal air movement |
| Sealer | Silicone or Caulk for wood joints |
Final Touches: Doors, Windows, and Finish Options for a Perfect Sauna Experience
When you have actually efficiently built the structure and mounted the furnace for your barrel sauna, it’s time to concentrate on the ending up touches that will certainly enhance the general sauna experience. This area covers the essential parts like doors, windows, and finish alternatives, in addition to extra attributes that can raise your sauna to a brand-new degree of convenience and style.
| Material | Attributes | Vorteile |
|---|---|---|
| Zeder | Natural resistance to moisture, pleasing fragrance | Resilient, includes an aromatic sauna experience |
| Thermally Modified Wood | Boosted moisture resistance, steady in high warm | Long-lasting, reduces shrinking and swelling |
| Solidified Glass | Heat-resistant, durable | Guarantees safety, allows for clear views without heat loss |
| Clear UV-Protective Oil | Enhances the all-natural charm of wood, safeguards from UV rays | Protects the timber while keeping visual charm |
Incorporating these final touches will not only enhance the functionality and aesthetics of your barrel sauna, but will likewise provide you with a more enjoyable and stress-free sauna experience.
If you feel that DIY saunas on your own is a hassle why not contact us, with over 40+ styles to choose from, we can also customize the whole range of saunas according to your needs, to fully increase the commercial value of your brand.
Das Geschäft vor ihm
Bauen Sie Ihre eigene Fasssauna: Eine Schritt-für-Schritt-Anleitung
Vom Verständnis der Bedeutung von Isolierung und Belüftung bis hin zur Gewährleistung der ordnungsgemäßen Wärmeverteilung, Gebäude a Laufsauna beinhaltet mehr als nur Holzbretter zusammenzubauen. Ich werde auch Tipps zur Integration eines Fass -Sauna -Gehwegs oder Decks für zusätzlichen Komfort und Stil teilen, sowie Ratschläge zur Auswahl von Heizungen, Türen, und Fenster, um Ihre Saunaerlebnis zu verbessern.
Wählen Sie den richtigen Ort für Ihre Fass -Sauna aus

Beim Starten des Projekts, Ihre eigene Fass -Sauna zu konstruieren, Die erste und kritischste Wahl, die Sie treffen werden, ist die Auswahl des richtigen Ortes. Eine Fass -Sauna wird mühelos in ihre Umgebung vermischt, Und der Bereich, in dem Sie es einrichten möchten, wird sowohl seine Leistung als auch den visuellen Charme erheblich beeinflussen.
Denken Sie über Zugänglichkeit und Bequemlichkeit nach
Der Ort Ihrer Laufsauna muss bequem zugänglich sein. Ein Sauna -Deck -Weg oder ein Weg, der direkt zur Sauna führt, Besonders in kälteren Monaten. Vorzugsweise, Sie beabsichtigen, Ihre Sauna in der Nähe Ihres Hauses zu positionieren, Die Gewährleistung des garantierenden, aber auch genügend Platz für persönliche Privatsphäre bietet auch genügend Platz für die Privatsphäre. Berücksichtigung der Nähe zur Residenz, Denken Sie an Bequemlichkeit: Sie werden möchten, dass die Sauna nur einen kurzen Spaziergang entfernt ist, Vor allem, wenn Sie sich darauf vorbereiten, eine Abkühlungssitzung nach der Sauna zu genießen.
Untersuchen Sie die Landschaft und das Gelände
Ein zusätzlicher wichtiger Aspekt ist die Landschaft. Das Gebiet muss in einem Gradbereich sein, der das Gewicht der Struktur aufrechterhalten kann. Eine milde Steigung kann zu Problemen mit Wasserentwässerung führen oder zu einer ungleichen Struktur führen. Wenn Sie Ihre Fass -Sauna setzen, Möglicherweise möchten Sie auch die Notwendigkeit eines Barrel Sauna Sidewalk Decks für die Nutzung der Oberfläche und einbezogen. Stellen Sie sicher, dass das Gelände fest ist, ohne sich bewegende Schmutz oder extreme Nässe. Eine solide Grundlage wird sicherlich die Lebensdauer Ihrer Sauna verlängern und jede Art von nicht benötigten Fixierungen stoppen.
Sonnenlicht und Privatsphäre
Die Sunshine -Exposition spielt eine Rolle bei der Erhaltung der Wirksamkeit der Sauna. Vorzugsweise, Sie müssen einen Ort auswählen, der in den kälteren Monaten reichlich Sonnenlicht erhält. Sonnenlicht hilft dabei, die Innentemperatur der Sauna während des kälteren Klimas zu halten, Minimieren Sie die Grundstücke Ihres Heimheizsystems. Dennoch, Das stabilisierende Sonnenlicht mit Privatsphäre ist ebenso wichtig. Wenn Sie Ihre Sauna zur Entspannung entwickeln, Berücksichtigen Sie einen Ort mit natürlichem Schutz, wie eine Reihe von Bäumen oder einen Zaun, Um eine intime und friedliche Atmosphäre für Ihre Saunaerfahrung zu entwickeln.
Überlegungen zum Wind und Wetter
Wind ist ein weiteres wesentliches Element bei der Auswahl eines Ortes. Sie müssen Orte vermeiden, an denen die Sauna kräftigen Winden enthüllt wird, da dies die Wärmeerhalte und Effektivität beeinflussen kann. Berücksichtigen Sie die Positionierung Ihrer Laufsauna in der Nähe von Windschutzen wie hohen Hecken oder anderen natürlichen Barrieren. Trotzdem, Seien Sie sich einer übermäßigen Nässe oder Entwässerung durch benachbarte Steigungen bewusst, die zu Wasserschäden führen können.
Mischung Material für Ihren Fass -Sauna Build
Beim Beginn der Reise einer Fass -Sauna, Eine der kritischsten Entscheidungen, die Sie treffen werden, ist die Auswahl der besten Produkte. Die Produkte, die Sie wählen, Fähigkeit, und Isolationshäuser.
Holz: Das Herz Ihrer Fass -Sauna

Die Art von Holz, die in Ihrer Fass -Sauna verwendet wird. Standard -Sauna -Wälder wie Zedern, Redwood, und Fichte werden aufgrund ihres Widerstands gegen Feuchtigkeit bevorzugte Auswahlen bevorzugt, Verfall, und die hohen Temperaturen innerhalb der Sauna. Zeder, insbesondere, wird für seinen angenehmen Duft bevorzugt, das steigert die Sauna -Erfahrung. Diese Hölzer können sich auch gegen die schwerwiegenden Veränderungen in der Feuchtigkeits- und Temperaturniveau halten, die während der gesamten Sauna -Sitzungen auftreten.
Während des Holzes pflücken, Es ist sehr wichtig sicherzustellen. Zusätzlich, Top -Kerbe verwenden, Dicke Holzplatten werden die Isolierung sicherlich verbessern und das Warme in der Sauna bewahren.
Isolationsmaterialien für die Energieeffizienz

Um sicherzustellen, dass Ihre Laufsauna effizient und energiesparend bleibt, Die Option des Isolierungsprodukts ist unerlässlich. Die häufigsten Materialien für die Isolierung einer Fass -Sauna sind Glasfaser- und Mineralwolle. Diese Produkte arbeiten bei der Erfassung von Warmen und verhindern, dass es entkommt, Dies minimiert zwangsläufig die Leistung, die erforderlich ist.
Zusammen mit den primären Isolationsmaterialien, Die Verwendung reflektierender Aluminiumfolie an den Innenwänden kann zusätzlich die thermische Wirksamkeit der Sauna verbessern, indem er warmer Rücken direkt in die Sauna spiegelt, Bei längerer Dauer heißer beibehalten.
Saunaofen: Auswählen der richtigen Wärmequelle

Das Heizsystem ist der Hauptteil Ihrer Laufsauna, Da reguliert es die Temperatur der Sauna. Bei der Auswahl einer Heizeinheit, Sie haben mehrere Möglichkeiten, einschließlich elektrischer, Holzverbrennung, und Gasheizeinheiten. Elektrische Heizeinheiten sind leicht eingerichtet und bieten einen Zeitgenossen an, bequeme Alternative zur Erhaltung des Temperaturniveaus der Sauna. Holzheizsysteme, auf der anderen Seite, Bieten Sie eine echte Erfahrung und können manchmal viel energieeffizienter sein.
Sowie der jugendlichere Favorit, Die Rotlicht erhitzte Sauna ist auch eine ausgezeichnete Wahl.
Bau eines Fass -Sauna -Gehwegs und eines Decks
Ein oft übersehener Aspekt des Bauens einer Fass-Sauna ist das umliegende Deck oder Gehweg. Ein Fass -Sauna -Gehwegdeck ist nicht nur praktisch, sondern verbessert die ästhetische Anziehungskraft der Sauna. Ein robustes und wetterfestes Deck aus Produkten wie Verbundholz oder Zedern ist ideal für die äußere Umgebung. Das Deck fungiert als Platz zum Abkühlen nach einer Sauna -Sitzung oder als Ort, um Handtücher und andere Gegenstände zu positionieren.
Schritt-für-Schritt-Anleitung zum Aufbau des Rahmens Ihrer Fass-Sauna
Der Aufbau der Struktur Ihrer Fass -Sauna ist eine wichtige Aktion, um ihre architektonische Ehrlichkeit und die totale Widerstandsfähigkeit zu gewährleisten. Unten finden Sie eine gründliche Schritt-für-Schritt-Anleitung zum Erstellen der Struktur, die die Struktur Ihrer Sauna erzeugen. The procedure is straightforward, yet focus to information is important for a successful construct.
1. Gather Necessary Tools and Materials
Before you start, make sure you have all the needed devices and products. Below is a checklist of what you will require:
| Tool | Objective |
|---|---|
| Measuring Tape | To measure the wood and ensure exact cuts. |
| Circular Saw | To reduce the wood planks to the proper sizes. |
| Drill | For screwing in the framing parts. |
| Level | To make sure the structure is even and square. |
| Screwdriver | For securing screws right into location. |
2. Plan the Sauna Frame Dimensions
The next action is to determine on the dimensions of the Laufsauna structure. Relying on the size of your sauna, procedure and plan out the following:
- Length: Typically between 6 Und 8 feet for a comfy sauna.
- Width: Normalerweise 5 feet, but it can vary based upon personal preferences.
- Height: Betrachten Sie eine Erhöhung von betreffend 7 Füße für genug Freigabe.
Zusätzlich, Betrachten Sie den Bereich für die Fass -Sauna -Gehwegdeck Wenn Sie beabsichtigen, eine als Komponente Ihres Sauna -Setups zu erstellen. Der Weg kann eine einladende Note und Hilfe bei Sauna Entry/Exit Simplicity umfassen.
3. Konstruieren Sie Allzeiten niedriger Rahmen

Beginnend mit der Konstruktion der unteren Struktur der Sauna. Legen Sie die niedrigeren Assistenzstrahlen auf einer ebenen Oberfläche und schützen Sie sie mit Schrauben. Allzeit niedriger Framework wird sicherlich als Basis der gesamten Struktur funktionieren, Es ist also wichtig, dass es quadratisch und grad ist.
- Legen Sie den Lichtstrahl nebeneinander mit einer gleichwertigen Leere dazwischen.
- Stellen Sie sicher, dass die Struktur angemessen aufgestellt ist.
- Doppelprüfabmessungen vor der Sicherung der Stücke in Position.
4. Assemble the Side Walls

When all-time low structure remains in place, begin assembling the side wall surfaces of the sauna. Start by cutting the side boards to the preferred length and afterwards affix them to the base framework. The walls will be bent, so ensure you account for this when gauging and reducing the boards.
- Use timber strips to develop a mild curve along the boundary of the sauna.
- Connect the boards to the bottom frame with screws, guaranteeing they adhere to the contour evenly.
For additional stability, consider including a sauna deck pathway that links the side walls. This not just contributes to the sauna’s look but also serves as a useful area to stroll along the barrel sauna deck.
5. Reinforce the Frame with Support Beams

After setting up the side walls, add support light beams across the top of the sauna to reinforce the framework. These beam of lights will supply the required support for the roof and guarantee the wall surfaces remain upright.
- Location assistance beams at regular periods (every 2 Zu 3 feet).
- Protect the light beams to the side wall surfaces and bottom frame with screws.
- Make certain each beam of light is level and appropriately aligned.
6. Attach the Roof Frame
The roofing of the barrel sauna should be designed to comply with the natural contour of the wall surfaces. Begin by developing a structure for the roofing system utilizing slats or beams that will certainly form a supportive framework for the roof materials.
- Make certain the roofing structure is safely affixed to the top of the side wall surfaces making use of screws.
- Look for any spaces or vulnerable points in the roof structure and reinforce them if required.
7. Installing the Final Touches

After the major structure is full, you can concentrate on including the ending up touches to the framework. This consists of making sure the barrel sauna deck is correctly constructed to provide an also surface area for strolling and possibly including doors and windows where required.
- Make sure the frame is fully straightened and square before continuing with the outside cladding.
- Double-check that the framework is protected and prepared for insulation and cladding.
| Komponente | Referral |
|---|---|
| Insulation Material | Fiberglass, Mineral Wool, Reflective Foil |
| Consumption Vent Location | Low near the floor |
| Exhaust Vent Location | High near the ceiling |
| Range Between Stove and Vent | A minimum of 2 feet for ideal air movement |
| Sealer | Silicone or Caulk for wood joints |
Final Touches: Doors, Windows, and Finish Options for a Perfect Sauna Experience
When you have actually efficiently built the structure and mounted the furnace for your barrel sauna, it’s time to concentrate on the ending up touches that will certainly enhance the general sauna experience. This area covers the essential parts like doors, windows, and finish alternatives, in addition to extra attributes that can raise your sauna to a brand-new degree of convenience and style.
| Material | Attributes | Vorteile |
|---|---|---|
| Zeder | Natural resistance to moisture, pleasing fragrance | Resilient, includes an aromatic sauna experience |
| Thermally Modified Wood | Boosted moisture resistance, steady in high warm | Long-lasting, reduces shrinking and swelling |
| Solidified Glass | Heat-resistant, durable | Guarantees safety, allows for clear views without heat loss |
| Clear UV-Protective Oil | Enhances the all-natural charm of wood, safeguards from UV rays | Protects the timber while keeping visual charm |
Incorporating these final touches will not only enhance the functionality and aesthetics of your barrel sauna, but will likewise provide you with a more enjoyable and stress-free sauna experience.
If you feel that DIY saunas on your own is a hassle why not contact us, with over 40+ styles to choose from, we can also customize the whole range of saunas according to your needs, to fully increase the commercial value of your brand.
Über den Autor

Willkommen auf unserem Blog! Mein Name ist Peter und ich bin der Hauptautor dieses Blogs. Als Sport-Recovery-Praktiker mit tiefem Interesse und Fachwissen.
Es liegt mir am Herzen, komplexe Konzepte klar und prägnant darzustellen, und es den Lesern zu ermöglichen, dieses Wissen durch eingehende Recherche und Erfahrungsaustausch besser zu verstehen und anzuwenden.
Vielen Dank fürs Lesen und für Ihre Unterstützung! Wenn Sie Fragen oder Anregungen zu den Inhalten haben, zögern Sie nicht, mich zu kontaktieren. Ich freue mich darauf, weitere interessante und nützliche Informationen mit Ihnen zu teilen und gemeinsam auf dieser Wissensreise zu wachsen!
